
BUILT-IN ROUTER TABLE WITH A (DUST-FREE) TWIST
The shop-built dust collector fence is the secret. The shop-built dust collector fence is the secret.
SHOP OWNER: James Jones LOCATION:
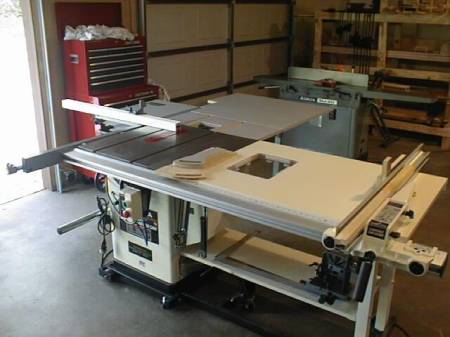
This project involved both economics and safety--safety being of first and foremost importance in any woodworking shop. I was in the market for a router table but I just couldn't justify anywhere from three to fifteen hundred dollars for one. A friend suggested I use the extension table on my new Delta Unisaw for a router table, because it had a good fence and plenty of room.
I wasn't very happy about cutting a hole in the table, but, if worst came to worst, I could always replace the melamine and start over. I thought it was going to be a snap; boy was I wrong!
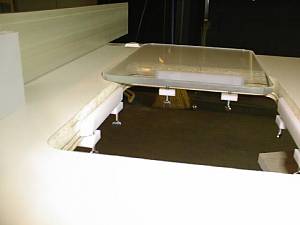
The first mistake I made was that I didn't read the instructions that came with the white nylon levelers for the router insert, which are made to be used on a minimum 1 1/16-in. thickness table top. I had to make a 1/2-in. plywood plate to mount under the 3/4-in. melamine so I could drop the clear insert level with the table top.
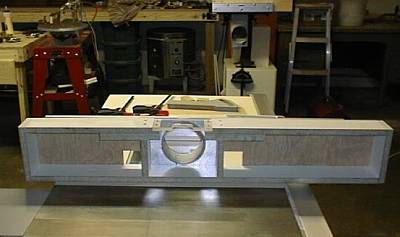
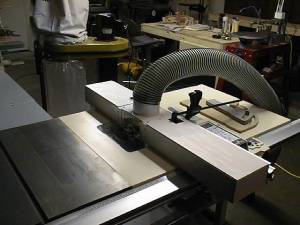
The fence took many days to figure out. At first, I tried using just a piece of melamine, with a shallow cutout for the router bit, clamped to the saw fence. It worked okay, but I had no room for attaching anything for dust collection. So, I came up with a box configuration that would accept the 5-in. hose connection from my model 73 Powermatic dust collector.
I purchased two router inserts, one for the router and one for the clear plate on the face of the fence. I cut several blank pieces so I can change out to fit the router bit. I can put paper shims behind the mounting screws if I need to shim the plate flush with the face.

Not including the cost of the router which I already had, I have approx. $50.00 to $60.00 invested in the whole project-two pieces of 3/4 x 2 x 4 melamine, two clear 3/8-in. router inserts and the mounting hardware-and it works as good as a $300.00 router table.
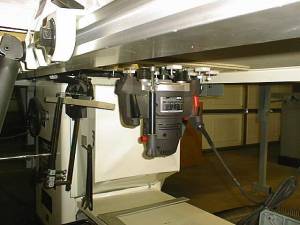
Just in case something goes wrong (which it has already) I made a plate for my router switch like the one I made for the tablesaw. Now I can turn off the router with a bump of my leg if something goes wrong, without feeling around for the switch.
. . . James Jones

Comments (0)
No comments yet. Be the first!
Leave a Comment