|
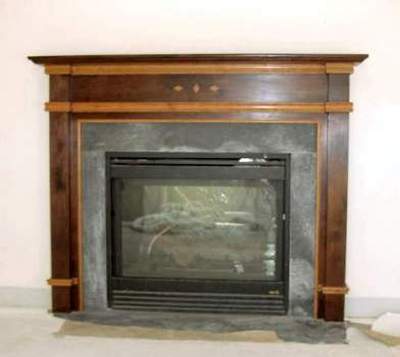
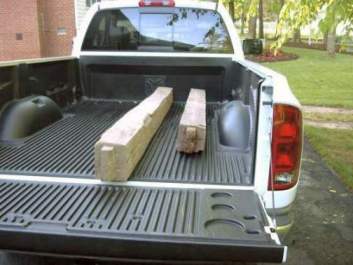
SOMETHING NEW FROM SOMETHING OLDNew life for an old post and beam timber. SHOP OWNER: David Yoho LOCATION: Mechanicsville, VA I had the unique opportunity to build this fireplace surround and mantle when a friend called and asked if I could make one for a new house he was building. At first, he wanted a simple rustic looking mantle shelf. After some discussion and looking at some samples, he decided on a more finished look. His main concern was that it not be too ornate looking. What made this project special is the wood. When my friend called to ask about making the mantle, he also asked if I could use a 16-foot timber he had. I said I'd need to see it and asked if he could bring it by my shop. He indicated he thought it was walnut and it was stored in a barn on his father-in-law's farm. I advised him to use a chainsaw to cut the timber in half so he could transport it home. When he arrived at my shop, I went out to see it. I immediately noticed the two original ends had tenons on them. This told me the timber came from an old post and beam structure somewhere. He told me back about 1950 his father-in-law bought the property and there was an old dilapidated barn on it. Several years later, he constructed a new barn and salvaged what he could from the old one. This timber must have been extra and they just stored it up in the rafters until now.
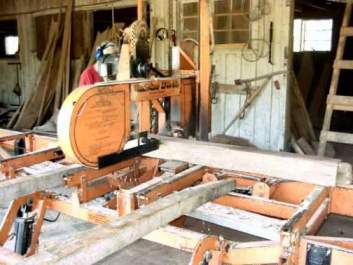
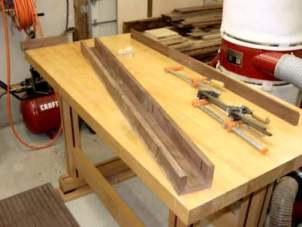
The surface of the two 8-foot, 6" x 6" timbers looked very rough. The outside faces were hand-hewn, which gives some idea of its age. He wanted to know if I could get enough wood from the timbers to make the mantle we had discussed. I wasn't sure at this point, since I needed to see the condition of the wood once it was cut into boards. The first order of business was to remove several cut nails I could see in the timbers. I used a metal detector to locate a couple that broke off below the surface. After removing all the nails I could find, the next step was to cut the timbers into boards. I contacted a friend with a bandsaw mill to see if she could cut them and what she would charge. Having someone saw these was much better than trying to do it myself.
Barbara Gill owns and operates LaGrange Resources near Urbanna, VA where she uses a Wood-Mizer bandsaw mill. Here she is cutting one of the timbers into one-inch-thick boards. It probably took her all of 15 minutes to cut both timbers into boards and that includes changing the blade after cutting a cut nail I didn't find beforehand. Even with the additional charge for hitting that nail, it was still worth it in the end.
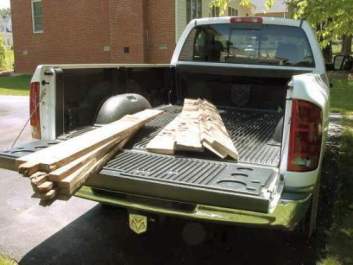
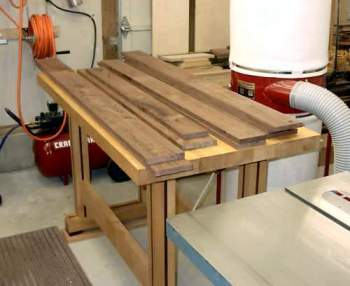
With the boards home, I studied them, took measurements, and decided there was enough clear walnut to build the entire mantle with the exception of the moldings I needed. Since my friend said he loved cherry, I recommended using it for the moldings since the two woods look good together. I worked up a sample of both woods with an oil finish on them so he could get an idea of how they would look together. He gave me the go-ahead and I got to work.
Processing the rough stock into finished stock started with face jointing all the boards. Next, I ran them through my thickness planer. Finally, I edge jointed the stock and cut off a number of defects on the tablesaw. The finished lumber is marked with a white pencil indicating to which part of the mantle each board corresponds. All boards are still at rough width and length at this point.
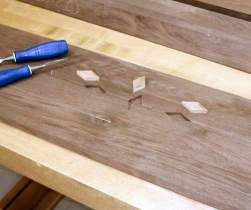
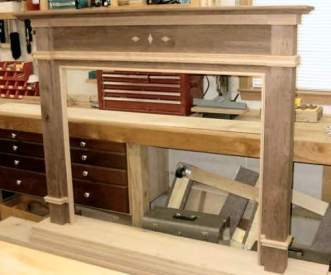
After discussing a design idea I had with my client and getting his blessing on it, I cut out some diamond shaped inlay pieces from cherry and cut the recesses for them in the face of the front frieze board. If you look closely, you can see the white penciled layout lines indicating the location of the moldings and centerline for the cherry inlays.
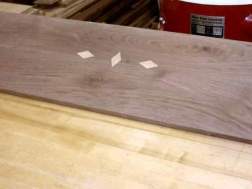
After applying a little glue, I tapped the diamonds in with a soft-faced hammer. The fit was perfect! Although these appear small, they really stand out in the finished mantle. This small feature not only tends to pull the viewer's eye to the center of the mantle, but I think it adds something special to it too. This is a case where simple is effective.
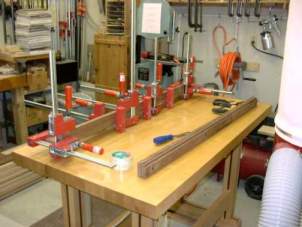
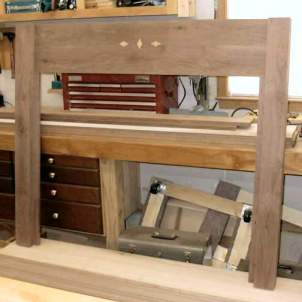
I mitered the inside corners of both pilasters. Before applying the glue, I ran a piece of clear packing tape down the back of the part that's clamped to the bench and left half of the tape for the other part. Next, I carefully placed the second piece against the edge of the first and pressed down to make the tape stick. Then I folded the two pieces up and used a piece of tape to hold them until I could add the clamps.
With the clamps on, I left it to dry before attaching the next piece of the pilaster.
To complete the pilasters, I attached the outside piece using a simple butt joint and pocket hole screws.
I attached the frieze board to the inside edge of the pilasters with screws through slotted holes to allow for wood movement. The vertical members attach to the inside edge of each pilaster with screws through the backside.
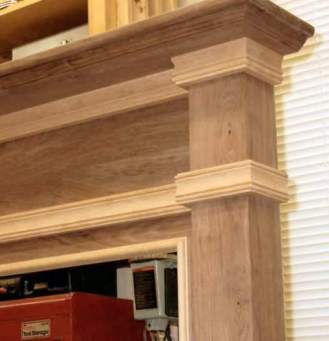
The next step was making the three architectural moldings I planned to use from cherry. I used architectural molding router bits from Eagle America. Initially, I was concerned about burn marks on the cherry but by turning my router's speed control all the way down and making multiple passes, I was able to get clean crisp burn-free moldings. This close-up view of the moldings also shows the mantle shelf resting on top and the cherry bead molding dry-fitted in place. I was able to take the mantle shelf over to the house and scribe it before bringing it back to my shop to remove the wood indicated by my scribe lines.
I had to attach the cherry bead molding and mantle shelf during installation. The bead molding will need to fit against the slate tile surround and cover the gap between the slate and the edge of the mantle. Ill also have to attach a mounting cleat to the wall just below the mantle shelf before installing it.
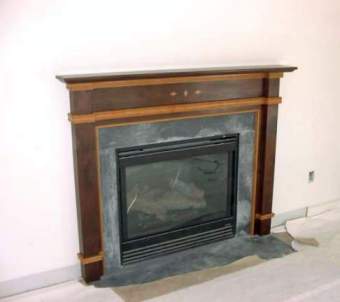
The entire surround and mantle received a hand-rubbed Danish oil finish. For extra protection, the top surface of the mantle shelf received two wipe-on coats of Waterlox satin. After the oil was dry, I applied two coats of paste wax to everything and buffed. To mount the mantle to the wall, I attached vertical poplar mounting cleats to the wall just inside of each pilaster and one horizontally just below the top mantle shelf. I used my brad gun to nail through the pilaster sides and into the cleats. After positioning the mantle shelf flush to the wall, I drove brads along the rear edge into the top cleat and along the front edge from below. I positioned the bead molding around the firebox opening and tacked it into place. I finished by filling all the nail holes with the appropriate colored blend-fill sticks.
. . . David Yoho
|


Comments (0)
No comments yet. Be the first!
Leave a Comment