Cart for Combination Machine Accessories
by Charlie Belden
The Robland X31 combination machine has quite a few pieces and parts that aren't normally left on the unit. The XYZ mortiser table is probably the heaviest of these parts. It's also…
- tricky to lift and carry because the table, if not locked down, can move and…
- isn't made to stand up in any position.
I thought it would be a good idea to make a cart just to hold the mortiser table so I wouldn't have to lug it around.
|
|
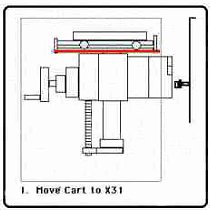
Roll the cart up to the X31… |
|
|
|
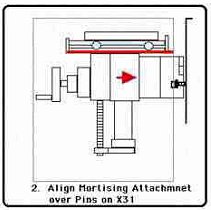
…slide the mortising table over its mounting pins… |
|
|
|
||
|
|
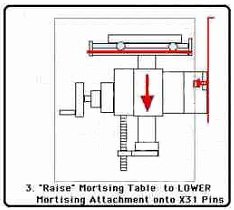
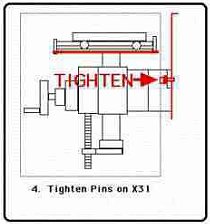
…raise the table… …tighten the bolts… |
|
|
|
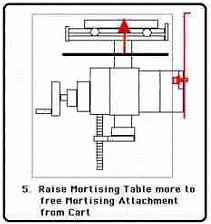
…raise the table some more… |
|
|
|
||
|
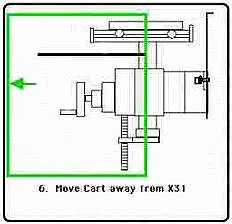
…and remove the cart. |
Pretty simple right? And why not make it so the top would be the same height as the tables on the X so it could also be used as an in or outfeed table? That's how I get in trouble. Start out with a simple idea for a quick and dirty and as I go keep adding additional design criteria.
Furthermore, I started out using whatever was around and then the materials started to change things as well. In this case, I had some leftover cherry ply. That led to mitering all the corners so the edges wouldn't show. That in turn led to using contrasting maple for the table tops on which the mortising table would sit.
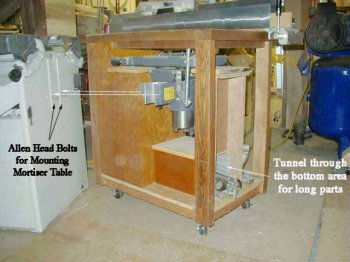
So here's what I've got so far. I still need to make some cabinet doors to close off both ends and keep dust off the parts inside but it's functional and almost all the X31 accessories and spare parts are finally in one place.
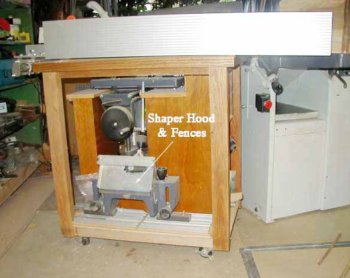
The other side and more stuff.
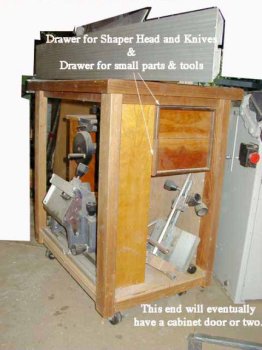
As a final insult to my “planning,” once the basics of the unit were in place I discovered there was room for some drawers. They were definitely an afterthought. I had enough space and scrap cherry (for drawer faces) so I made two drawers. The drawer face wood looked like a desert landscape to me so I framed them—in black walnut. They hold the shaper head and knives as well as the little stuff for the X.
That's the way I seem to make stuff. Start out simple and then let things evolve. But I'll let you in on a little secret—I did it all in MDF first—pocket screwed things together to test ideas and then made the real thing when most of the bugs had been worked out. I learned that from Norm—make the prototype before using the Good Stuff.
Comments (0)
No comments yet. Be the first!
Leave a Comment