Spiral Texturing Tool
by Ray Lanham
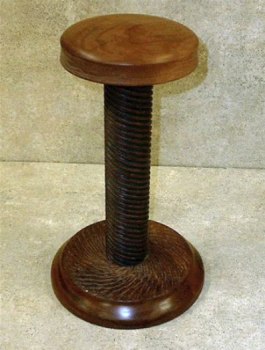
I made a hat stand for a cowboy hat I recently made and wanted something a bit different to complement the hat. A Canadian turner friend, Eugen Schlaak's proficient texturing encouraged me to try and Dominic Greco inspired me to roll my own with his home-made handle.
The stand is made from cherry and the Sorby cutter I purchased is the 6mm spiraling cutter. I used it to create the random texture on the base (weighted by an old faceplate) and the tool was used with the saddle (also home made from hardwood) to maintain a constant angle so that I could create the spiral.
My first attempt at the spiral (without the saddle) was promising but failed. It was then that I realized that the saddle was required to maintain a constant angle. Once I figured that out and made the saddle, the rest was history. Sorby has three videos on their site explaining the use of the tool and how to position it. I couldn't have been successful without those videos.
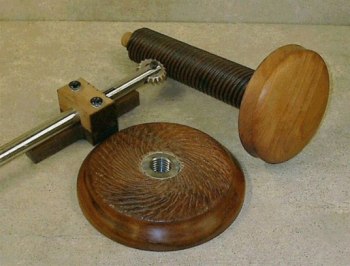
Here you can better see the random texturing of the base. The saddle (my word description) is shown and the cutter is in the approximate angle I used to turn the spiral. You can see the faceplate peeking up through the cherry base. The cherry was turned to enclose the faceplate and allow the tenon to be fitted into the threaded section.
The top and base of the hat stand were finished with Russ Fairfield's home-brew (spar varnish, tung oil and naptha) featured here on WoodCentral. The spiral was sealed with Bulls-Eye's de-waxed shellac and then flat black paint added and then wiped off to accent the depth of the spiral.
Fashioning the CutterI had a piece of ¾" diaameter stainless steel in my scrap box. So I drilled a hole 1½" from one end a bit larger than the thickness of the cutter. I hack-sawed a slot down to the hole to remove the area where the cutter would fit.
Using an angle grinder I smoothed the sides of the slot, then positioned the cutter so that I could drill a 7⁄32" hole for the bolt. I drilled out one side of the slot bolt hole to ¼" and tapped the 7⁄32" hole for ¼-20. I used a socket headed cap screw for the bolt and a Nylok nut on the other side to lock the cutter in place.
Back in the Saddle…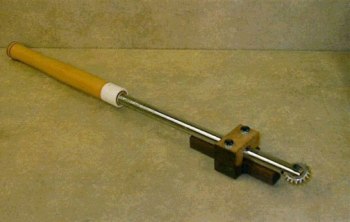
The saddle is rosewood on the bottom and cherry on the top. I used two ¼" T-nut's in counter bored holes on the bottom to accept the ¼" bolts that I inserted through the top of the saddle with washers and lock washers. The ¾" hole was bored in the cherry with a Forstner bit and then the sides were made straight on a band saw.
Once the saddle was fitted and the desired angle was determined, the screws were tightened down and away I went. This was a fun project to build and use. The cutter is $39.95 from a variety of suppliers, the steel and wood were reclaimed scrap and the ferrule is scrap plastic pipe. Commercial sets of five cutters and handle cost about $200. If you're a DIYer like me, you'll enjoy the challenge and the money savings.
Comments (0)
No comments yet. Be the first!
Leave a Comment