Making a New Front Door
by Mike Fitterling
You may recall I hit the hurricane trifecta in 2004, three of the four hurricanes that hit Florida that year having swept through my burg. I sustained considerable roof and porch damage, the reconstruction of which inspired, nay, necessitated the restoration of the front door to one more fitting the late Craftsman style of my 1914 house.
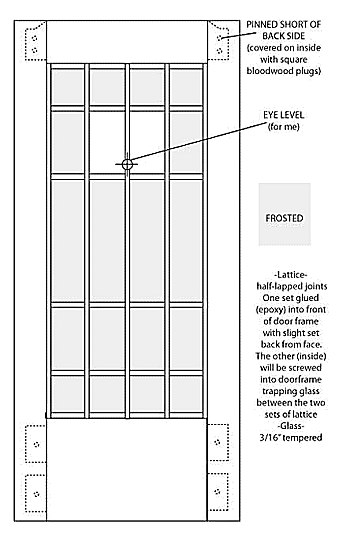
First--the plan (drawn after the fact, so it is not to scale).
The door is cypress, chosen for its rot resistance, which is not really critical in this instance because the door will be under a nine foot or so overhang on the veranda. Another reason for the choice is that this old house is made of only two woods that I know of—cypress (siding) and heart-pine (everything else).
I did the haunched tenon on the top rail thinking it might help prevent the wide board from cupping down the road, plus I just wanted to try making them that way.
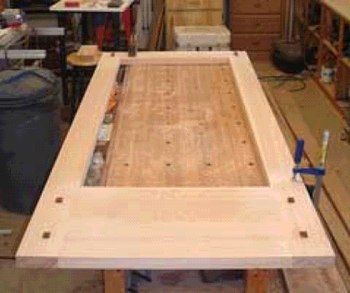
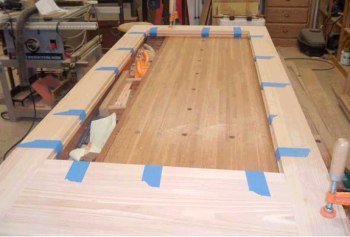
Here is the door frame glued up. I capped the tenon pins with squares of bloodwood. I took an old hollow chisel mortising bit to define the square inlay area and cleaned it up with a chisel. There was a little play from corner to corner; if you pushed on one the other would jump up a bit, so I clamped it flat to the bench and as I added the retaining strip and the front lattice the spring was less and less noticeable. It is not perfect, but is serviceable.
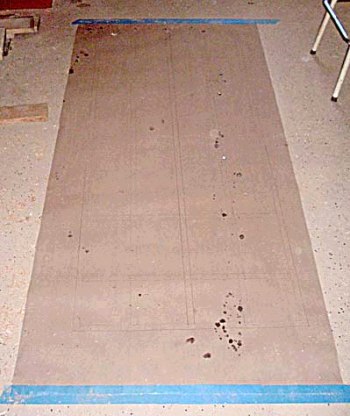
To get the layout of the latticework correct and to work out the proportions I did a full scale drawing and taped it to the floor. Once I got everything the way I wanted, I took my measurements from the drawing. I used this drawing to later make the plan above, which is why I said it was done after the fact.
Here's a detail of how the lattice went together; a simple half lap joint. I glued it ups with epoxy, but once it dried I had some of the joints fail, so I switched to poly for the rest of the assembly and had no more problems. I was kind of winging it on this project.
I made two identical sets. One will be glued in the outside face of the door and the other will be screwed into the door frame on the inside, capturing the single pane of glass between the two. The lattice stock was about ¾"x½".
I planned on a friction fit of the lattice to the frame and planned on simply gluing it. It did not work—too many gaps appeared after trimming the outside of the lattice with a block plane. So I used a router and a slot cutter and cut a groove all around the inside of the frame. Into these I glued cypress strips to serve as a back stop and gluing surface for the lattice. These were thinner by a hair than the glass will be.
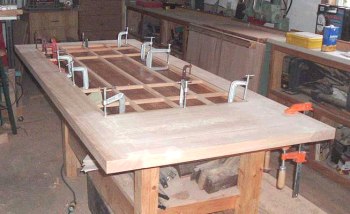
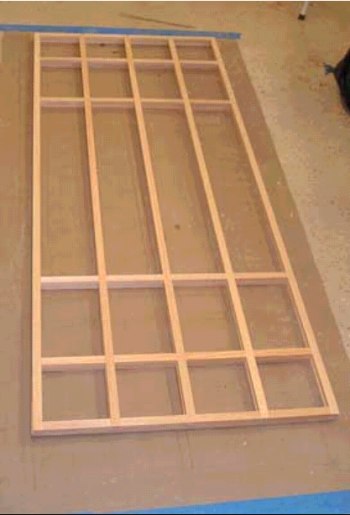
Here, I have glued the lattice into the frame and against the strip with poly. There is a light reveal around the entire frame, maybe 1⁄32" .
Here is a pic of both lattices in their places. The one on the inside face still needs holes for the screws drilled so it can be screwed into place once the glass is installed
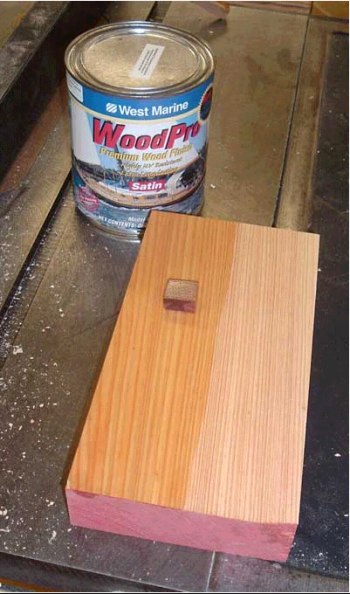
And here, on a couple scraps of the same woods, is the finish that will be used. I originally thought I would just paint the outside—my experience with varnishes when boating was telling me it was no use to keep it natural on the outside. But, what the heck, the door is under the veranda roof and only gets direct light for a short period each day, so I figured I might as well give it a shot. If it flakes quickly, I'll just paint it then. The inside will, of course stay varnished and that is the side I put the bloodwood plugs on. I figured that's the side we will see most of the time.
I could have gotten double insulated glass, but then expense and thickness, etc. convinced me to do this simply. And anyway, the current front door is a beat up door frame with a jalousie window insert—anything will be better—and all our windows are single pane glass (house was built in 1914, and just about everything is original). And finally, this is Florida, after all. Our howling winds are usually tropical in nature and not frigid Nor'easters with wind chill—not too many Alberta Clippers make it down to here, either.
The idea of a clear glass door sounded nice until I thought about everyone on our busy street looking into our living room. Kramer and his reverse peephole (a Seinfeld episode) comes to mind. I hit upon the idea of frosting the glass to let in the light but retain some privacy. The glass supplier told me it wouldn't hurt the tempered glass to do it.
My father-in-law does, along with woodworking, glass work. He has all the stuff to do the frosting for me. We figured it would be nice to mask off the middle two panes in the second row from the top and keep them clear and frost the rest. Those panes are just about eye level for me, so they give us a little peep hole without compromising our privacy.
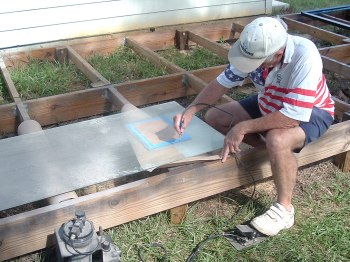
In this pic my father-in-law is starting to do the frosting on the tempered glass panel. The technique is a pneumatic/abrasive process—like sandblasting. He usually does small things, so all we had to work with was a tiny little tip. It took a couple hours with us taking turns. Of course, after we were finished he found his fan tip. Working with such a small tip made the frosting a little irregular that actually ended up looking good, kind of a pleasant mottling.
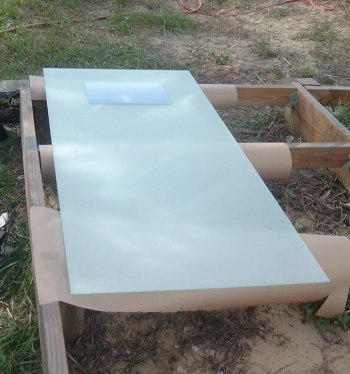
In this pic the frosting is finished and you can see the mask still over the clear area.
On the inside of the latticework I put a small bead of silicone, which I flattened out with my finger and let dry before installing the glass, making a nice cushion for the glass to rest against.
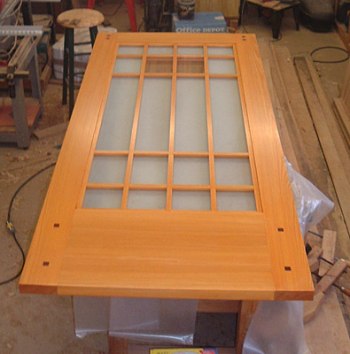
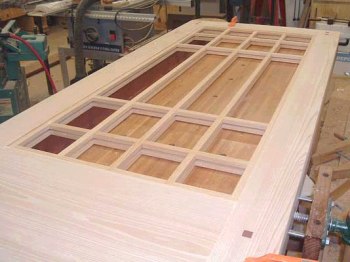
Here is the finished door with the front lattice in place. You can see how the two lattices capture the single glass pane. The clear section aligns roughly with my line of sight, so I can look out to see who's calling. The inside lattice is held in place by brass screws, four on each side and two at the top and bottom.
I can't wait to see the door in place, but that will have to wait until the painting and woodwork finishing is complete inside.
Comments (0)
No comments yet. Be the first!
Leave a Comment