Sorby Hollowmaster
Excerpts from The Messageboards
Ed Kelle: I've had this tool for a while, even done a few projects with it, but as time goes by, I seem to be getting worse with it. And I have no clue why. I seem to be following the instructions, having the tip at center height, and I discovered I have less twisting going on when I place the straight part of the tool on the rest rather that the curved part. Their instructions for sharpening, putting the topside of the cutter flat on a stone did not seem to make any difference. I did however touch up the bevel on the grinder which made some difference in its ability to cut.
One of the main problems is that I am getting a good deal of bouncing going on with the tool, particularly towards the bottom of the vessel in through a little farther up the cut as it begins to slope upwards. When I have reached say the halfway up point of the vessel to the top it isn't nearly as bad. I even tilt the tool slightly downwards like a real scraper which helps a little. I am trying to be as gentle with this as possible, so it is not a question of me trying to take too big of a cut at once, at least I hope not. I have tried switching the position of the cutter, placed it in the holder both with the cutter on the inside edge of the curve, and also with it on the outside of the curve. Not much difference.
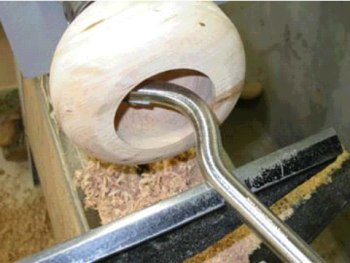
I've tried varying the angle of the cutter in the holder as well, can't really figure out where I should be placing it. Here is where it is at right now, so any suggestions from those who have used this tool successfully would be appreciated.

I am starting to think that maybe having this option of changing the angle of the cutter might not be as good as a hollowing tool that has it in a fixed position, like most of the tools I see out there.
I'm open to any suggestions that will keep me from saying more bad words tonight. Thanks
Carole in VA: I had an awful time learning to use that tool. You definitely need the straight part of the shank on the tool rest. My toolrest is 3 or 4" from the vessel rim. This reduces the tendency for the tool to roll on you. I also keep the toolrest slightly above center and tilt the tool down slightly. I also reground the cutters so they don't have as steep a bevel. I think this regrinding was the key…they were just too aggressive. By the way, I have never been able to sharpen them as Sorby suggests by doing the flat edge. I thought it was just me!
Brad Vietje: I don't have this particular hollowing tool, but a number of others that are similar. As Carole writes, do keep the rest back under the straight part of the shaft. Don't worry about staying at center—you can cut way above center with this sort of scraping cutter, with a rotation counter clockwise (left), but don't let the tip go lower than the center—that can be exciting.
I also find it easier to get used to this sort of hollowing tool on an end-grain piece, so you don't get the cyclical transition from end grain to side grain, etc…I also find that harder, finer grain woods like sugar maple or beech scrape better than softer, more open woods like butternut.
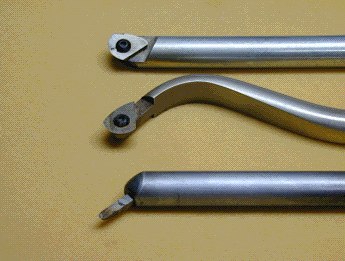
Jamie Donaldson: Ed-I don't know what Sorby recommends for sharpening, but I have found over the years that a grind angle of about 60° at the tip is the best cutting angle. The tip you show doesn't indicate the angle, but I recommend rounding the point into more of a semi-circle. Here is a view of some of my hollowing tools, and as a student of David Ellsworth's long ago I still follow his procedures in my own toolmaking and sharpening because they work!
I made a special bit holder to grind 3⁄16" high speed steel and a number of other special gadgets which turned sharpening into a drawn out chore. While taking an Ellsworth workshop, David revealed the no hassle secret sharpening trick—duh!! Slightly round the edges of your regular 60 grit AO grinder wheel with a dresser, then simply lay the tool (with bit installed!) on the grinder rest at whatever angle you prefer. Sharpen the left side to tip of the cutter by moving slightly back and forth on the rounded right edge of the wheel, then switch sides! The flat center of the wheel is not used at all—so quick and easy that you're back to the lathe with a fresh cutting edge in seconds!
RK in Milwaukee: Carole's is on the right track. You should never, never, ever have the curved part of the tool on the tool rest. Only the straight part should be on the tool rest. Otherwise the tool will whip around inside of the vessel once you get inside. This means that the tool rest will be a good distance from your turning at first.
I found these tools to be easier to use if the cutter bit is as sharp as possible, but you have to go in with a light touch at first. The cutter is very efficient. I sharpen the cutter at the same angle as a scraper, which is essentially what it is.
As Carole mentioned, Sorby's method of sharpening is not very good. I made a bit holder out of ½" square bar stock to hold the bits which I sharpen on a Tormek.
In the beginning, use the tool to hollow out a bowl. This will help you get a good feel for the tool while you can see what you are doing.
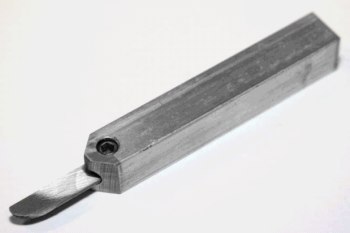
The bit holder for sharpening is ½" square bar stock. 9⁄32" drill about ½" deep from the end for the bit. Drill and tap top for 1/4-20 set screw.
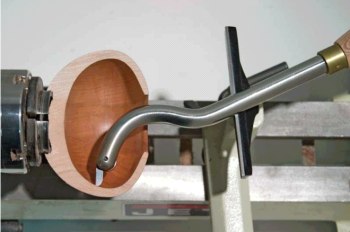
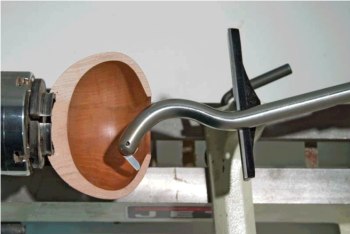
Your cutter bit is on the wrong side of the tool and so it is not on the centerline. Move your tool rest back even more. This and the two photos that follow illustrate tool and bit positioning. Note that cutting should be done off the tip only. Hope this helps.
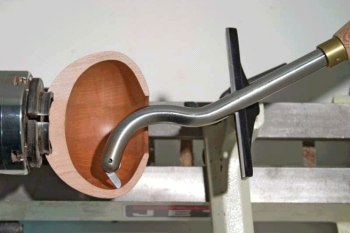
Mac: You might try shortening the amount of cutter exposed. You only need enough to clear the bar, any more and you are throwing the whole thing out of balance. The further out the cutter sticks to the side, the further it is beyond center. Once you get the hang of it, its a great tool. Also, it's only meant to be used up to about 8" deep.
Comments (0)
No comments yet. Be the first!
Leave a Comment