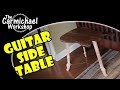
I needed a side table to put next to my favorite chair in my office/music room. I have several guitars on display, so I thought it would be cool to make a guitar shaped side table to keep the music theme going. I used my X-Carve CNC Woodworking Machine from Inventables to cut the table top and legs. Check out the video of this project below.
I'd like to thank Inventables for sponsoring this project. I used their free EASEL online software to design the project. The top is cut from a 16"x24" panel of 3/4" walnut. The legs are cut from a 9"x21" section of 9/16" thick maple. (I had to plane the maple down to 9/16" thick so that the standard tuning pegs would fit. I also made the mortises 9/16" wide to match.) Click here to open my EASEL project to see how it's designed.
The design includes the mortise and tenon joinery for gluing the legs into the table top. The CNC leaves rounded inside corners on the tenons, so those need to be sharpened up with a chisel, file or saw so the joint will fit tightly.
I purchased an inexpensive set of Guitar Tuners from CB Gitty. You will notice that one of the holes in the scaled-down guitar neck legs is larger than the others. This is to mount one of the standard size guitar tuners on each leg. I strung up a regular .042" A string between the tuners for some additional support to keep the legs from spreading apart under weight. The .056" E string would be a little stronger and more visible, but I didn't have one on hand.
This Guitar Side Table is a great addition to my office/music room. I love it and it's a great conversation piece. The walnut and maple look beautiful and I think the "stringer" at the bottom is pretty clever if I do say so myself. Thanks for checking out my project!
Clicking a referral/affiliate link in this article and making a purchase will help to support my channel via a small referral fee from the merchant. Thank you for your support!
While I wanted to wait until the project was complete before showing it, I have just finished a mammoth step, so decided to share the progress.
Starting with a slab of American Walnut
It has been resawn into two pieces, and joined together to create a slab of the required width
Then, after 24 hours of solid routing on the Torque CNC
And a quick initial application of Danish Oil (as much to find where I need to do additional sanding), the result is starting to show some promise. (The gauges are only to test fit, they will not join the project until it is pretty much complete). The top station (the celtic design within a circle) is not just decoration, it will also be a clock. The gauges are all high quality German-made ones I bought from Carbatec.
Exhausted getting this far, and I still have to have it finished by Sunday!! And tomorrow is a day away from the shed
What does it look like when three different people build three different parts of a table? It turns out looking WACKY. The guys from the Making It Podcast came together to create something fun!
Jimmy Diresta and David Picciuto and I have been recording a podcast together called Making It for the last 8 years. We have recorded several live broadcasts of Making It and the most recent being the one at Maker Faire in Louisville, KY. Since we were all going to be in town together we decided to collab and make a table. Here’s the kicker: we each made a 1/3 of the table separately.
While we were in California, the team and I brainstormed what we could do for my 1/3 of the table. We thought of everything from a colorful oil and water mixture to trying to create a something made of resin for the table top. We landed on something that I got pretty excited about – creating a plinko game.
2. My 1/3 of the Table
Starting off, I used 1/2 inch MDF that I picked up at a local hardware store and using basic geometry (can you believe Geometry in high school actually paid off?) I drew out the shape of the table top. Using a digital protractor, ruler, and a pencil I made a 120 degree angle. From there I went 12 inches out and that will give me the curve and the outside profile. The back walls of the table are being made out of 1/4 inch MDF so as I was preparing my 1/2 MDF to cut, therefore I had to make sure I accounted for the material I was going to be adding in later.
Using the jigsaw I cut out the base of the table then I used the table saw and miter saw to cut the 1/4 inch MDF for the back sections of the table. By cutting a miter into the two pieces, the corner would fit in with the other two sections of the table that Jimmy and David made. Since the table won’t be carrying a ton of weight, I used wood glue and pin nails to hold the base and back walls together. At this point, I painted it black (you already know my love for painting it black – get the t shirt here!) Josh went over to the laser to cut out the acrylic pieces.
The top and front portions were both clear acrylic in order to see the marble going through the plinko game; the interior piece was lasered with tiny holes for the 3 mm acrylic rods to stand in as the obstacles for the marble. The acrylic rods came in a pack and I needed to use the laser to cut them down to fit them into each hole. Honestly, the trickiest part was figuring out how to mount the tilting acrylic inside of the table; it had to be angled for the marble to roll but also have the clearance to roll down.
3. Putting the Pieces Together
For the front piece of acrylic, I pre-drilled holes into the MDF to attach it with screws. Next, I used one of the 3mm acrylic rods as the pivot point for the tilt – I attached that with acrylic cement and a Total Boat 4 minute epoxy to make sure it stands the test of time. Later, I 3d printed a knob to go on the end for easy manipulation of the tilt.
After getting that together, I cut down the rods to fit into the holes on the orange acrylic. Since the holes cut were every so slightly too big, I glued each rod in place for security. To mount the tilting piece I attached a small block of wood with a sanded taper on it and drive a screw to capture that back corner allowing it to pivot on that screw.
When I tested it out, I realized there were straight paths downhill with negates the game aspect. Therefore, I cut down additional acrylic walls and set them up in between random pins to force the marble to go different places – above all I wanted to make the game more fun!
4. Adding the Acrylic
For the last piece of acrylic, I drilled holes in the top for the marble to be dropped in and I attached it to the table game frame with glue to the front piece.
Attaching the acrylic top to the back walls made of 1/4 inch MDF didn’t go as smoothly. I had to drill a hole slightly bigger than the screw I used through both the acrylic and the MDF, fill that hole with CA glue and then put in the screw. I did this in order to allow the glue to harden the MDF for the screw to sink into rather than splintering up the MDF with the screw.
To finish up my part, I used a thick dowel as the leg and I used a hardware set to make a tapered leg. It came with a plate that goes on the bottom of the table, with a threaded insert and a threaded rod. I put the insert in the dowel and used that rod to connect the table to the leg. With the addition of the leg – my part is DONE!
5. Finishing the Table
Just as I predicted, David’s table was modern and slick and looked really good. Jimmy’s was filled with stuff from his shop with resin and a bent wrench for the leg. We used a Total Boat epoxy along with a circular piece of WOOD to attach the three pieces together.
When we flipped this table over it looked – interesting. It was fun to put our heads together and create something totally different. Be sure to check us out weekly on the Making It Podcast.
Tools List:
(purchasing via these affiliate links supports ILTMS)


.jpg)