Theory of Evolution
9 May 2025 at 12:08
Things have been busy for me over the last few years and I’ve been very active in the shop with regular things like organization, maintenance, and tweaks to the shop layout. The focus has also shifted towards product development, although I’m approaching the testing phase (if you’re interested in being a tester, subscribe to my blog for updates).
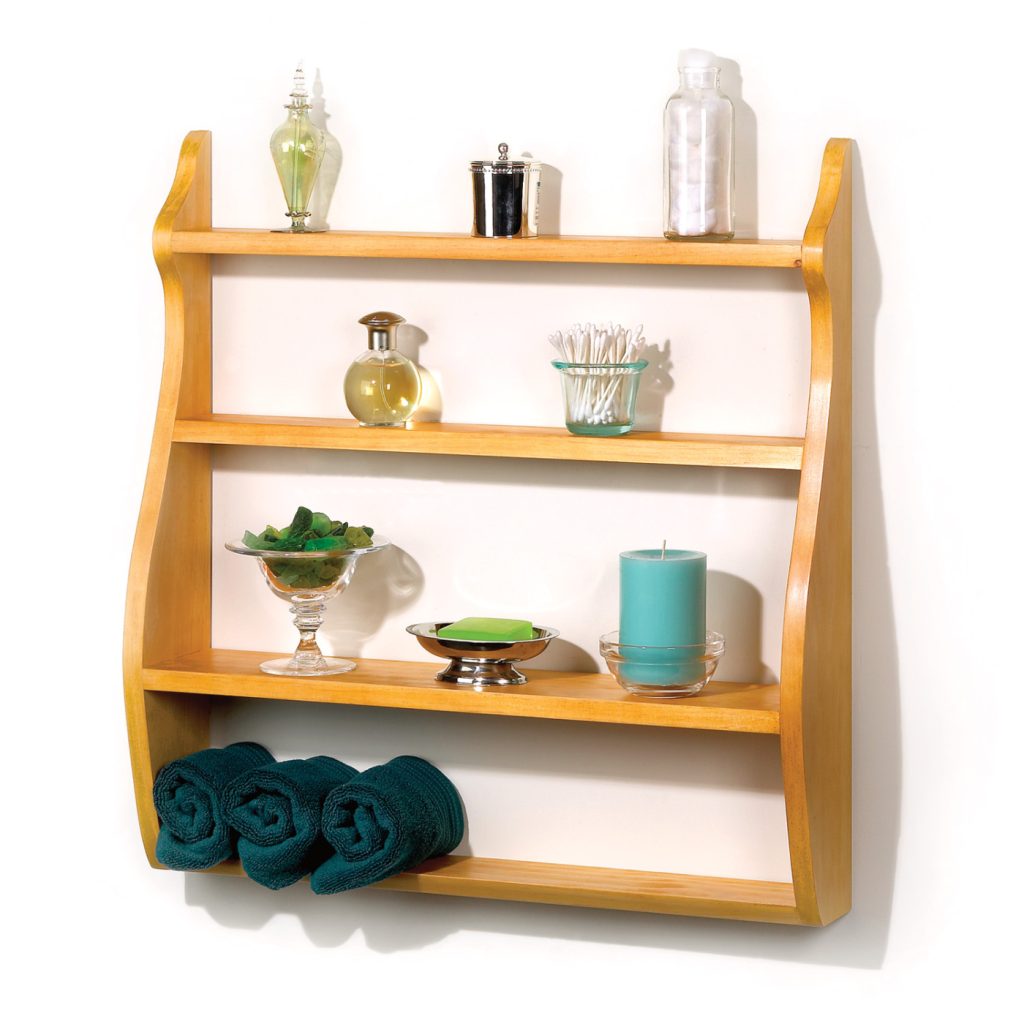
Recently, I realized a simple and quick storage project that would provide some much-needed extra space and organization in the room that often suffers the most from clutter – the bathroom. All that was required was a few scraps of melamine, some edge banding, a handful of screws, and an hour or two.
The inspiration was a cluttered counter, and realization that there was a lot of wasted space in the cabinet below the sink since it had 21 inches of height, but the items inside were much shorter. Adding a shelf was the obvious solution, but a good solution wasn’t that simple. Here’s what I considered:
I decided that the last option made the most sense for my situation, so set about to make the shelves.
Once I established the size, I cut the melamine shelves to size. Then I created a template to round over the protruding corner from a piece of 1/4 inch MDF. I drew the curve with a compass, cut close to the line with a jigsaw, then finished it with a sander.
I positioned the template on each shelf, aligning it with my fingertips before clamping the template and shelf to my bench. If I were making many, I would have taken the extra time to incorporate stops in the template to automatically align it with the shelves.
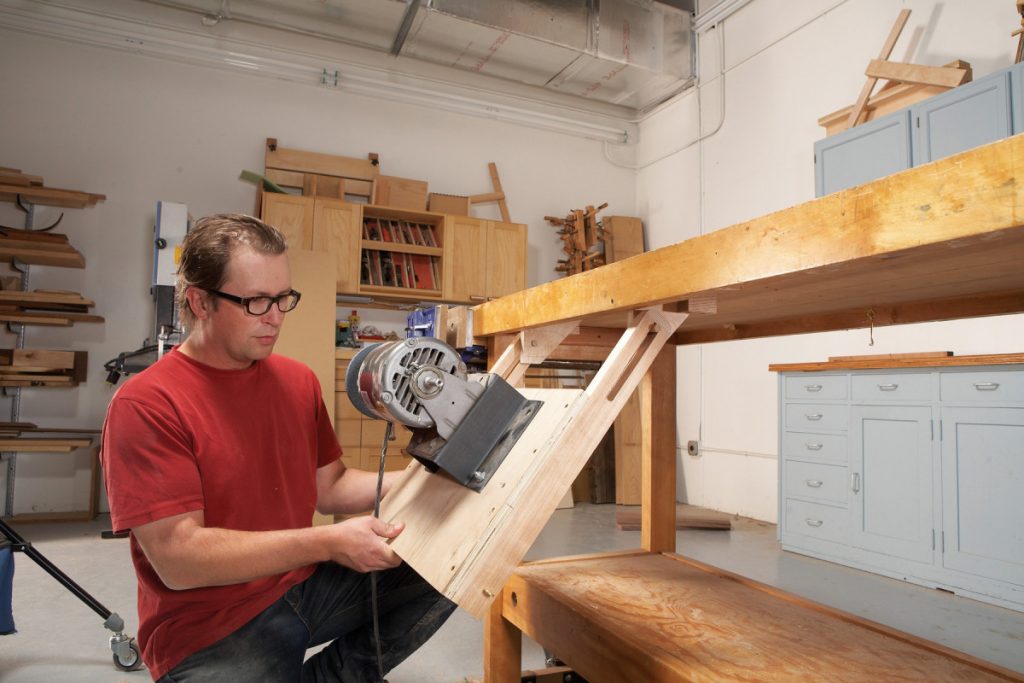
Then I installed a large diameter template bit in my router and machined the corners. (Larger diameter bits tend to produce smoother cuts, and allowed to waste away the entire corner saving me the step of removing most of the waste first). To keep from cutting into the bench, I used a pair of stand-offs.
Then I used an iron and roller to apply pre-glued iron-on melamine edgebanding. I found it helpful to start in the middle and work outwards, so a slight misalignment was less likely to result in the edge not being covered at the end. I could have also taped it loosely in place to ensure alignment and worked from end to end.
To trim the edgebanding, I used my flushing plane which has been such a useful addition to the shop. The skewed blade helped ensure I didn’t push the edgebanding off the substrate as I worked.
Finally, I used a foam abrasive block to ease the edgebanded edges.
With that, the shelves were ready for installation.
I used four pocket hole screws to install the shelves – three in the side, and one in the back. Then I loaded them up. The two shelves provided room for dozens of bottles and small containers, freeing up the bottom of the cabinet for larger items. It was very rewarding and satisfying to see the level of organization afforded by this small and simple upgrade.
A final note about tolerances: most saws produce a better quality cut on one side than the other. Since these shelves would be seen from the top only (with the possible exception of the plumber), I didn’t take any precautions to reduce or eliminate chipout and instead made the cuts on my table saw with my flat top ripping blade set about 2 inches above the material. This helped ensure a chip-free top surface at the cost of more chips on the bottom.
On the other hand, a router tends to produce clean edges top and bottom. The straight flutes of the router bit I used produced flawless results on the corners, but a spiral compression bit would be even more reliable.
Compare these two pictures showing the top and bottom of the same shelf. The straight sections were cut with the table saw, and rounded corners with the router.
![]()
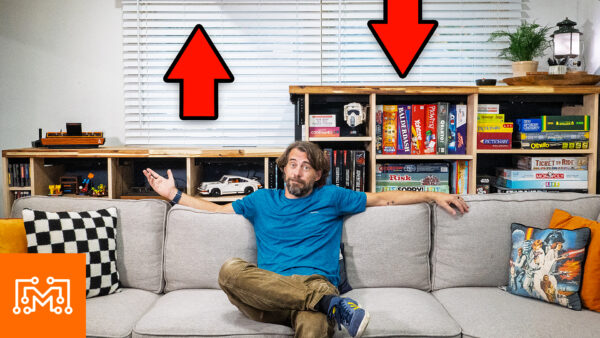
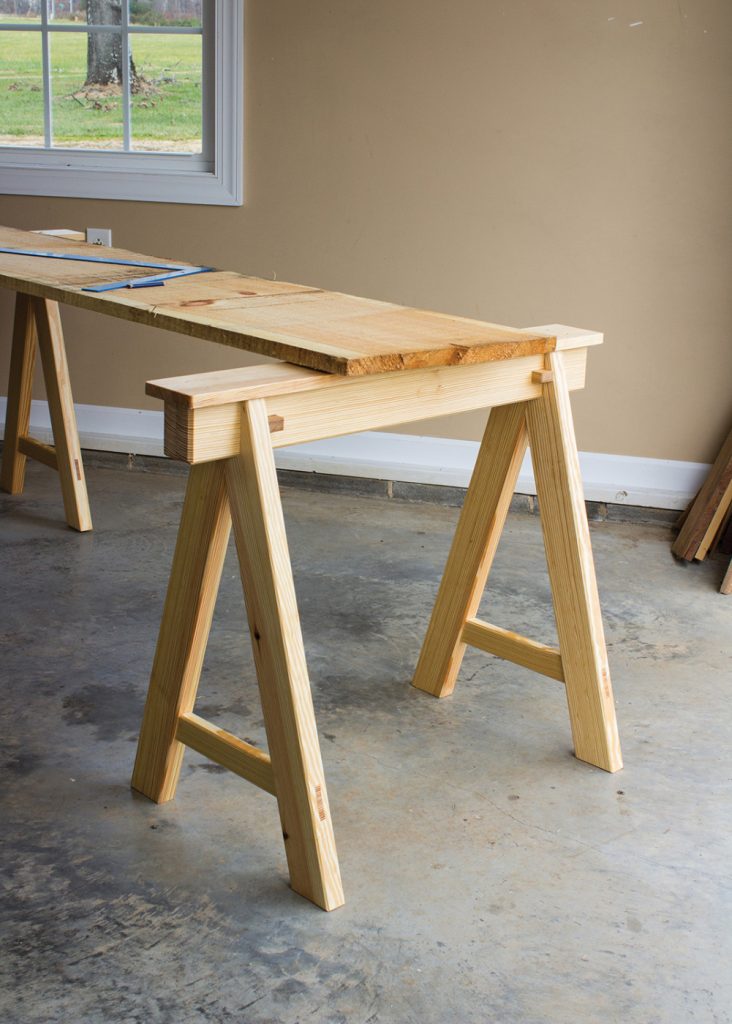
When I renovated my basement earlier this year, I created a great family hangout space with a couch, TV, and ping-pong table. We’ve been using it constantly – my kids with their friends, family movie nights, the works. But there was one problem that kept bugging me: we had nowhere to store our board games and gaming systems, and no place to set drinks while hanging out on the couch.
![]() I didn’t want to add another bulky cabinet to the room – that would just eat up more space. Then I saw a video from Andy Klein where he mounted 3D printers under a standing desk, and it got me thinking. What if I could create a narrow table behind the couch that could lift up to reveal hidden storage underneath? I ended up buying two adjustable standing desk frames that could extend up to 72 inches each, enough to span the length of our couch setup.
I didn’t want to add another bulky cabinet to the room – that would just eat up more space. Then I saw a video from Andy Klein where he mounted 3D printers under a standing desk, and it got me thinking. What if I could create a narrow table behind the couch that could lift up to reveal hidden storage underneath? I ended up buying two adjustable standing desk frames that could extend up to 72 inches each, enough to span the length of our couch setup.
![]() The build started with designing two different storage units in Autodesk Fusion (and btw, you can learn to do this too with our Fusion course). One cabinet was specifically laid out for board games, with shelf spacing that would accommodate most of our collection. The other cabinet was designed to hold video game systems, with space for controllers and wiring. Both units would mount underneath a butcher block top that would attach to the desk frames.
The build started with designing two different storage units in Autodesk Fusion (and btw, you can learn to do this too with our Fusion course). One cabinet was specifically laid out for board games, with shelf spacing that would accommodate most of our collection. The other cabinet was designed to hold video game systems, with space for controllers and wiring. Both units would mount underneath a butcher block top that would attach to the desk frames.
![]() I could have used plywood for the top, but since this was going to be a piece of furniture we’d use every day, I went with a 39-inch wide island-style butcher block. By cutting it in half lengthwise, I got both 17-inch pieces I needed, and it actually came out cheaper than buying two standard 24-inch pieces. The butcher block wasn’t light – but the desk frames can handle over 300 pounds each, so weight wasn’t going to be an issue.
I could have used plywood for the top, but since this was going to be a piece of furniture we’d use every day, I went with a 39-inch wide island-style butcher block. By cutting it in half lengthwise, I got both 17-inch pieces I needed, and it actually came out cheaper than buying two standard 24-inch pieces. The butcher block wasn’t light – but the desk frames can handle over 300 pounds each, so weight wasn’t going to be an issue.
![]() The cabinets themselves were pretty straightforward – just plywood with pocket holes and adjustable shelves. I added edge banding to hide the plywood edges and give everything a cleaner look. The tricky part was mounting everything to the desk frames, which I had to cut down to make narrower. I designed and 3D printed some custom end caps to cover the cut steel legs and make everything look finished.
The cabinets themselves were pretty straightforward – just plywood with pocket holes and adjustable shelves. I added edge banding to hide the plywood edges and give everything a cleaner look. The tricky part was mounting everything to the desk frames, which I had to cut down to make narrower. I designed and 3D printed some custom end caps to cover the cut steel legs and make everything look finished.
![]() The standard desk controls weren’t going to work well behind the couch, so I got creative. I’d recently done a project with a motorized projector screen where I used an Arduino to add voice control through my smart home system. I applied the same concept here, modifying the desk controllers so I could raise and lower the storage with voice commands. As a bonus, I added an inductive charger, USB ports, and power outlets to the top surface for convenient phone charging and power access.
The standard desk controls weren’t going to work well behind the couch, so I got creative. I’d recently done a project with a motorized projector screen where I used an Arduino to add voice control through my smart home system. I applied the same concept here, modifying the desk controllers so I could raise and lower the storage with voice commands. As a bonus, I added an inductive charger, USB ports, and power outlets to the top surface for convenient phone charging and power access.
![]() The final result turned out better than I expected. When everything’s closed, it looks like a normal sofa table – a perfect spot for drinks and phones. But with a quick voice command, the whole thing lifts up to reveal our gaming storage. The motors are surprisingly quiet, and the movement is smooth even with the cabinets fully loaded. It wasn’t a cheap project – standing desk frames and butcher block aren’t exactly budget materials – but the functionality made it worth the investment.
The final result turned out better than I expected. When everything’s closed, it looks like a normal sofa table – a perfect spot for drinks and phones. But with a quick voice command, the whole thing lifts up to reveal our gaming storage. The motors are surprisingly quiet, and the movement is smooth even with the cabinets fully loaded. It wasn’t a cheap project – standing desk frames and butcher block aren’t exactly budget materials – but the functionality made it worth the investment.
Sometimes the best solutions come from using things in ways they weren’t intended for. This project took a standing desk mechanism and turned it into a piece of furniture that solved multiple problems at once: we got the drink holders we needed, hidden storage for our games, and it all tucks away neatly when we don’t need it. Plus, the voice control feature still makes me smile every time I use it. It’s exactly the kind of project I love – something that looks simple but has some clever engineering hiding underneath. Thanks for joining me, now go make something awesome!
(purchasing via these affiliate links supports ILTMS)
The post Hidden Storage with a Twist appeared first on I Like To Make Stuff.
Have you ever faced a boring home organization task and wished you could make it more exciting? That’s exactly what happened to me when I realized I needed to tackle my chaotic spray paint collection. Instead of settling for a standard storage cabinet, I decided to challenge myself to create something unique, functional, and fun. In this post, I’ll walk you through how I took a simple storage project idea and turned it into a fun solution that might inspire your next project idea.
![]() Before diving into the project, I took stock of my situation. I had about 75 spray paint cans scattered around my workshop, making them difficult to organize and access efficiently. I didn’t want to take up any additional floor space, and I needed to be able to easily search through and grab individual cans. With this in mind, I started brainstorming creative solutions that would go beyond a basic boring cabinet.
Before diving into the project, I took stock of my situation. I had about 75 spray paint cans scattered around my workshop, making them difficult to organize and access efficiently. I didn’t want to take up any additional floor space, and I needed to be able to easily search through and grab individual cans. With this in mind, I started brainstorming creative solutions that would go beyond a basic boring cabinet.
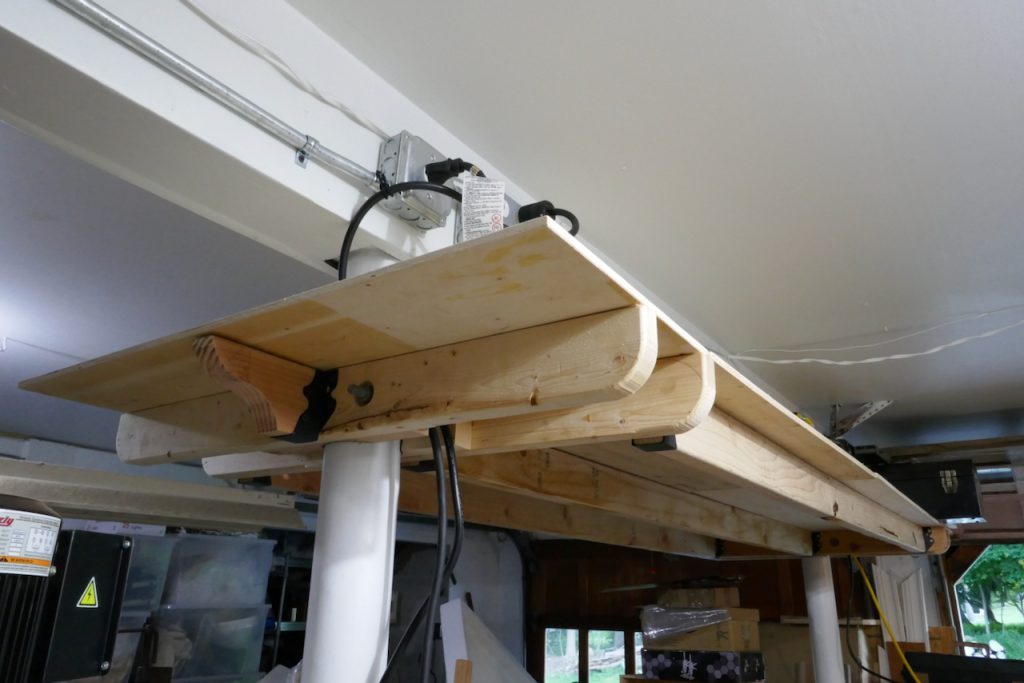
![]() At first I thought about using unused space next to my bandsaw, creating a drop-down storage system in the exposed ceiling joists. It’s a lot of unused space and would do a great job of hiding the cans out of sight when not needed. But I also noticed the basement support beams that are scattered throughout my workshop that can not be moved.
At first I thought about using unused space next to my bandsaw, creating a drop-down storage system in the exposed ceiling joists. It’s a lot of unused space and would do a great job of hiding the cans out of sight when not needed. But I also noticed the basement support beams that are scattered throughout my workshop that can not be moved.
![]() What about making better use of unusable space that can’t be changed? Plus it would always be at hand. After considering these options, I settled on the idea of creating a circular storage system around one of the basement support poles. This approach would maximize space efficiency and add an interesting visual element to my workshop.
What about making better use of unusable space that can’t be changed? Plus it would always be at hand. After considering these options, I settled on the idea of creating a circular storage system around one of the basement support poles. This approach would maximize space efficiency and add an interesting visual element to my workshop.
![]() To bring my idea to life, I used 3D modeling software (Use my Fusion course to learn now!) to design the components, a 3D printer to create custom parts, and a laser cutter for precise wooden discs. The design process involved several key elements: creating a base that could be easily assembled around the pole, designing spinning shelves to hold the spray cans, and developing a modular system that could be expanded as needed. One challenge I faced was figuring out how to make the shelves removable while still being stable. I solved this by creating interlocking pieces that could be secured with screws.
To bring my idea to life, I used 3D modeling software (Use my Fusion course to learn now!) to design the components, a 3D printer to create custom parts, and a laser cutter for precise wooden discs. The design process involved several key elements: creating a base that could be easily assembled around the pole, designing spinning shelves to hold the spray cans, and developing a modular system that could be expanded as needed. One challenge I faced was figuring out how to make the shelves removable while still being stable. I solved this by creating interlocking pieces that could be secured with screws.
![]() With my prototypes ready, it was time to put everything together. I started by attaching the base to the pole using hose clamps. Next, I assembled the rotating shelves, gluing the 3D printed pieces to the wooden discs. Finally, I stacked the shelves onto the base, making sure each level could spin freely. During assembly, I realized I had underestimated the number of cans I needed to store. It’s not a huge deal, I can make more storage, but take it from me—count your cans before you start a project like this!
With my prototypes ready, it was time to put everything together. I started by attaching the base to the pole using hose clamps. Next, I assembled the rotating shelves, gluing the 3D printed pieces to the wooden discs. Finally, I stacked the shelves onto the base, making sure each level could spin freely. During assembly, I realized I had underestimated the number of cans I needed to store. It’s not a huge deal, I can make more storage, but take it from me—count your cans before you start a project like this!
![]() The finished product is a unique, cylindrical spray paint organizer that makes efficient use of previously wasted space around a support pole. Not only does it store my spray cans more effectively than a traditional cabinet, but it also adds an interesting visual element to my workshop. I was able to think outside the box and turn a boring task into a challenging adventure, leading to a pretty fun solution. By setting constraints and embracing creativity, I was able to create a custom solution that perfectly fits my needs.
The finished product is a unique, cylindrical spray paint organizer that makes efficient use of previously wasted space around a support pole. Not only does it store my spray cans more effectively than a traditional cabinet, but it also adds an interesting visual element to my workshop. I was able to think outside the box and turn a boring task into a challenging adventure, leading to a pretty fun solution. By setting constraints and embracing creativity, I was able to create a custom solution that perfectly fits my needs.
![]() While this specific project might not be for everyone, the principle of making mundane tasks more interesting can be applied to many aspects of home improvement. Whether you’re organizing tools, planning a garden, or tackling a cleaning project, think about how you can add a creative twist to make the process more enjoyable and the result more satisfying. Remember, the goal of DIY isn’t just to save money or time – it’s also about learning new skills, solving problems creatively, and taking pride in your living space. So the next time you face a boring home task, ask yourself: How can I make this more interesting? Now go make awesome stuff!
While this specific project might not be for everyone, the principle of making mundane tasks more interesting can be applied to many aspects of home improvement. Whether you’re organizing tools, planning a garden, or tackling a cleaning project, think about how you can add a creative twist to make the process more enjoyable and the result more satisfying. Remember, the goal of DIY isn’t just to save money or time – it’s also about learning new skills, solving problems creatively, and taking pride in your living space. So the next time you face a boring home task, ask yourself: How can I make this more interesting? Now go make awesome stuff!
(purchasing via these affiliate links supports ILTMS)
The post Turning Boring Storage Into an Interesting Spray Can Solution appeared first on I Like To Make Stuff.