Clamp-Free Rip Fence
 After years of fumbling with clamps, I decided there must be a better way to attach featherboards to my tablesaw’s rip fence. Two T-tracks screwed to the fence allow me...
After years of fumbling with clamps, I decided there must be a better way to attach featherboards to my tablesaw’s rip fence. Two T-tracks screwed to the fence allow me...
After years of fumbling with clamps, I decided there must be a better way to attach featherboards to my tablesaw’s rip fence. Two T-tracks screwed to the fence allow me...
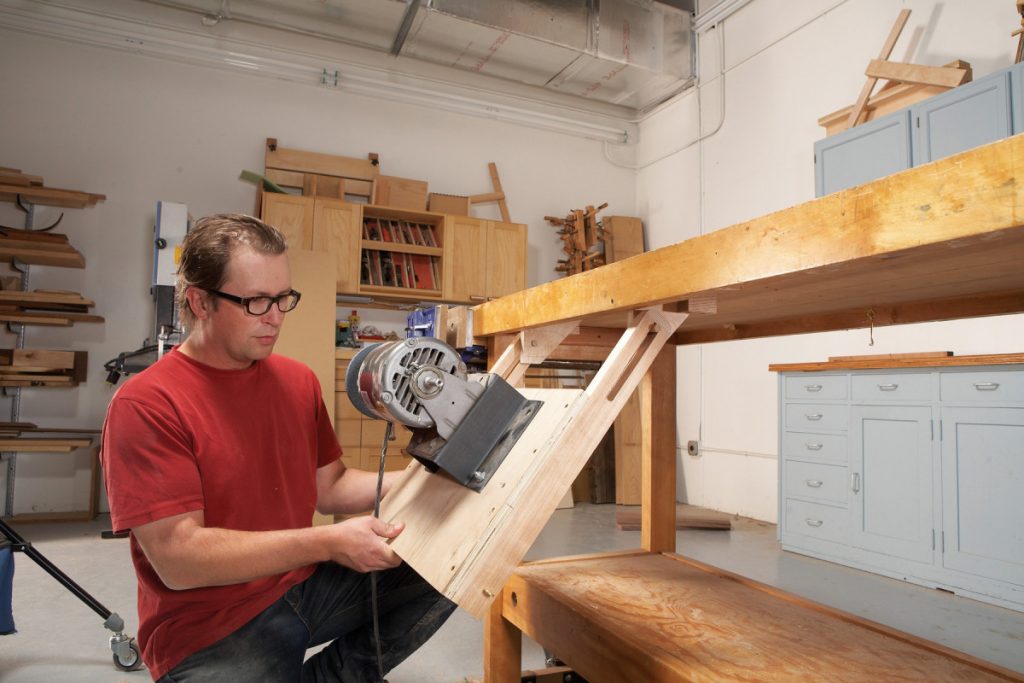
 While making Shaker boxes, I built a jig to accurately rip 1/16″ thick strips without getting my hands too close to the blade. In fact, I can leave the guard...
 I’ve tried all kinds of jigs for installing drawer slides, none to my satisfaction. My jig holds the drawer slides right where I want while I install them. You can...
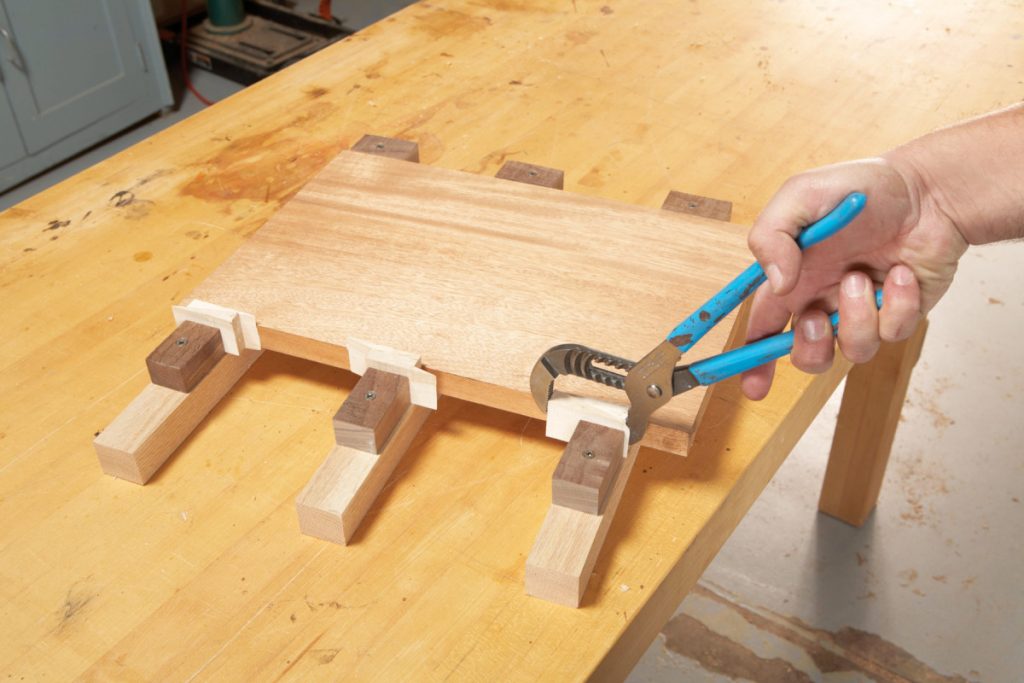
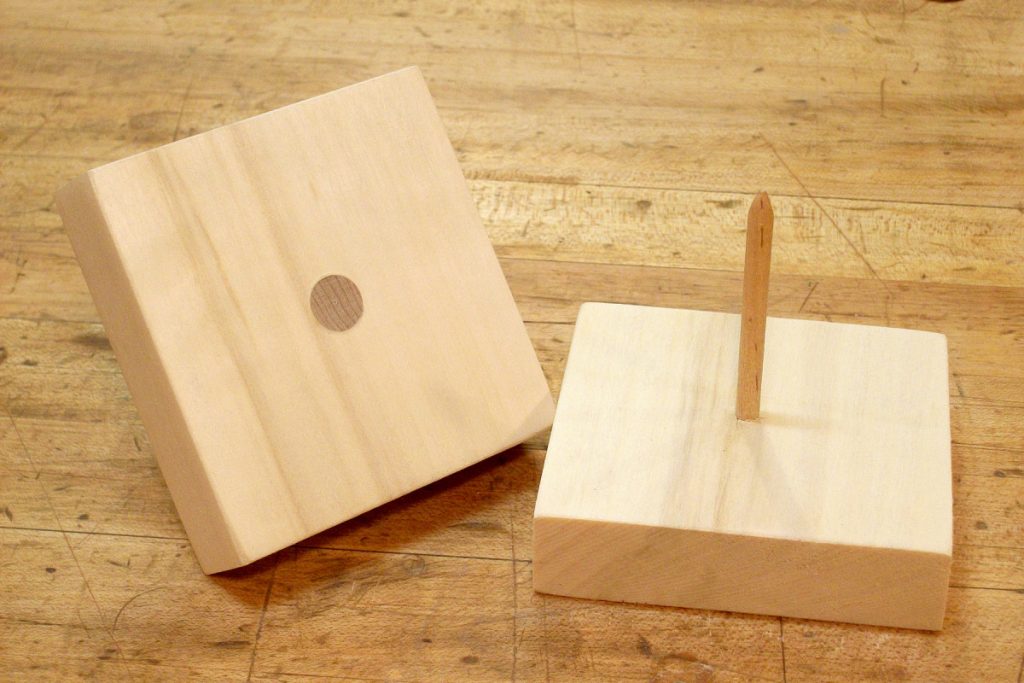 When I’m finishing a project, I support it on small stands. They raise the project off the bench so I can get at its lower edges. I’ve seen stands like...
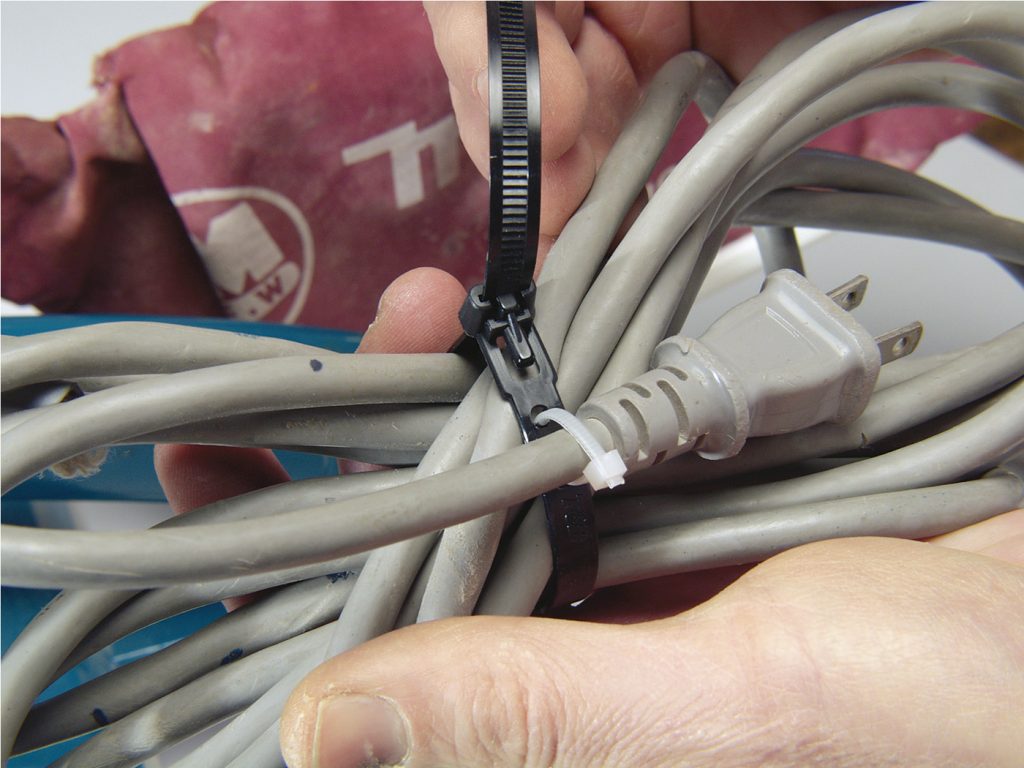 My power tool cords were always in a tangle, so I finally did something about it. All it took was a couple of cable ties; a small standard one and a large resealable one....
 C-clamps can make nasty dents that are tough to sand out. Pads or block will prevent this, but they’re often awkward to hold in place while you tighten the clamps....
 One day while disposing trash at the landfill, I discovered a pristine miter saw. It looked perfect—well, almost. The blade was covered with nasty burn marks. I love fixing old tools, so I took the saw home, expecting to recondition …
 I hated the black hole that appeared when I installed corner bifold doors in my kitchen cabinets. To get rid of this annoying gap, I decided to make the main door (the one with the hinges) 3/4-in. wider, so it …
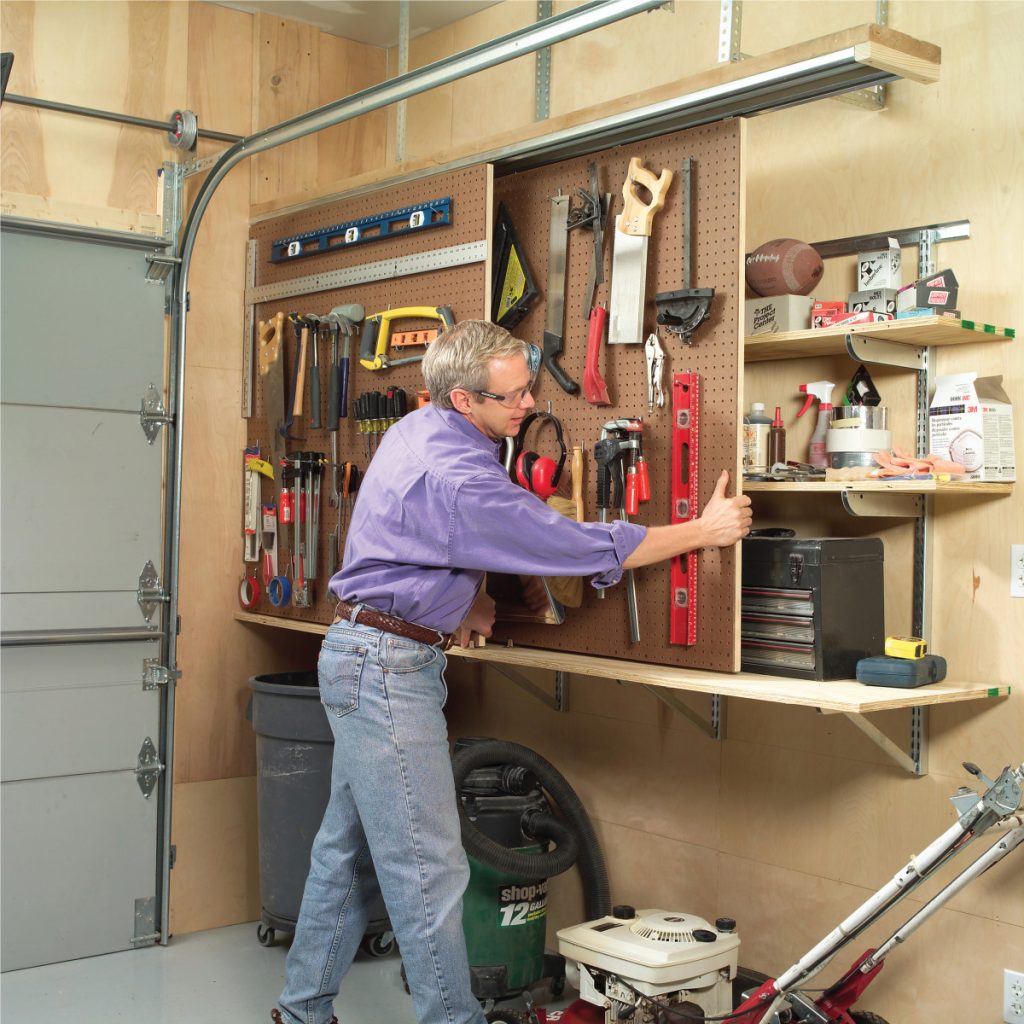 Six great ideas for space-challenged woodworkers to get more out of their small shops.
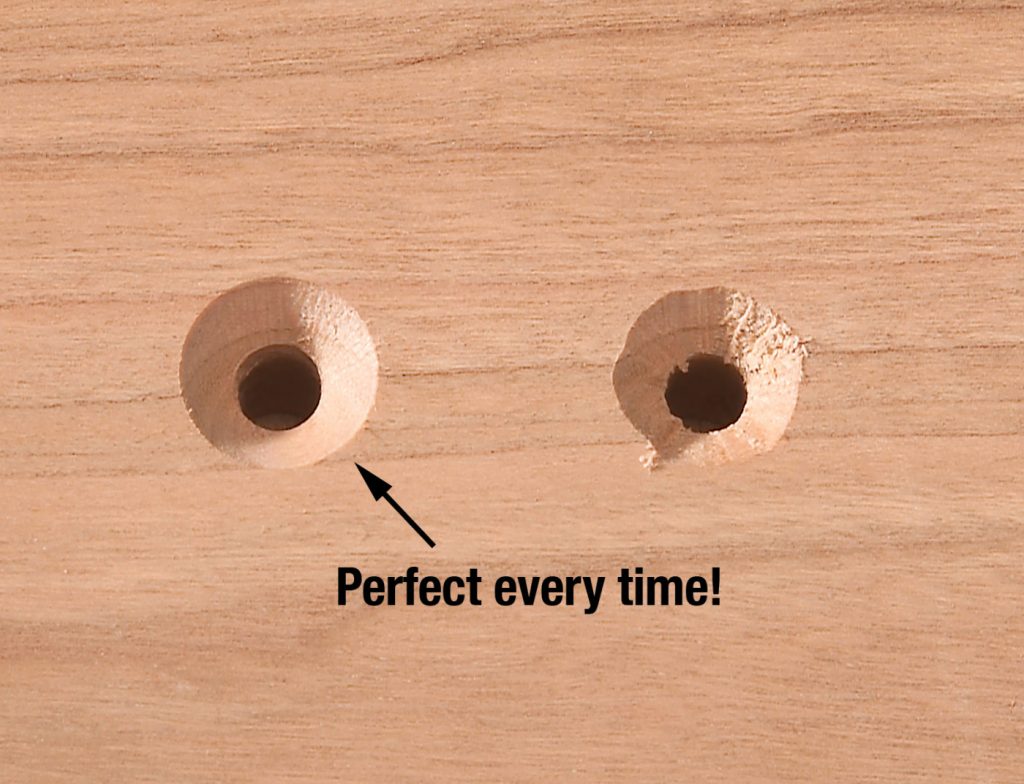 Countersink first, drill the pilot hole second. That may sound backward, but it’s the easiest way to ensure a perfect countersink.
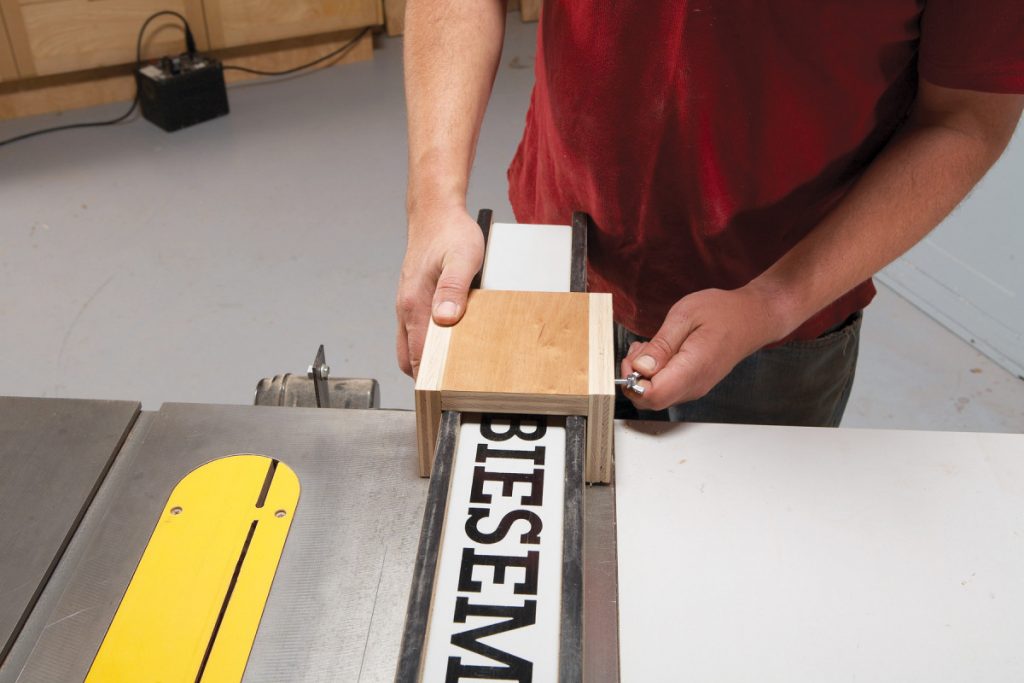 Here’s a no-frills, adjustable block for making stopped cuts. Cut three pieces of 3/4″ plywood sized to fit your tablesaw’s rip fence. Install a T-nut in one of the side pieces before assembly. Thread a short piece of threaded rod …
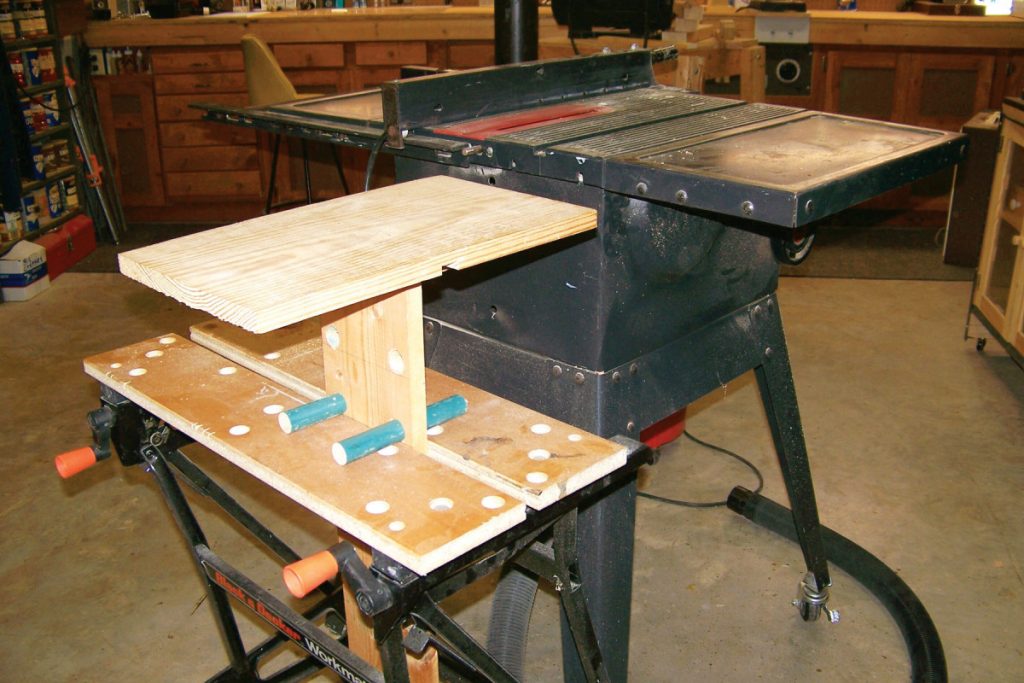 I frequently need an outfeed table or work support for long pieces, so I built this T-shaped assembly to use in conjunction with my Black & Decker Workmate. The table is just a horizontal board that’s dadoed, glued and …
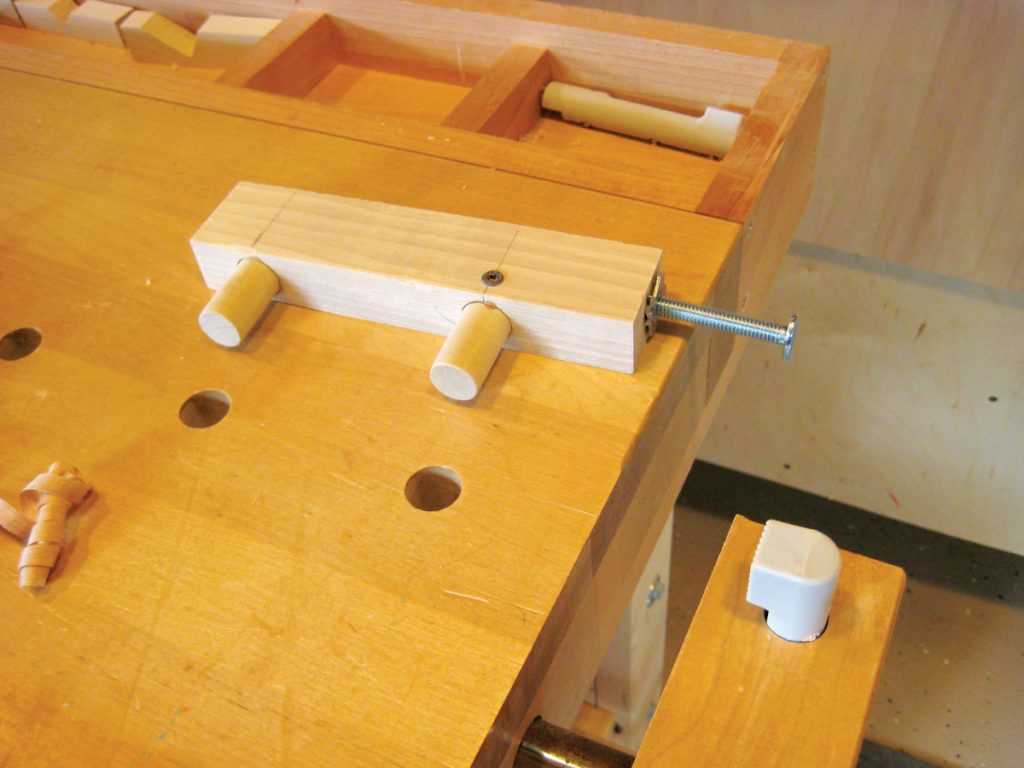 A workpiece ALWAYS SLIPS when placed vertically in my vise, because the vise racks. To solve the problem, I made a vise spacer from a 1”x 2”x 6” hardwood block, a 1/4” T-nut, a 1/4” x …
 I ran short of clamps in the heat of making a set of panel doors, so I quickly made more from stuff I had in my shop. These clamps are based on an old design, but the idea still works …
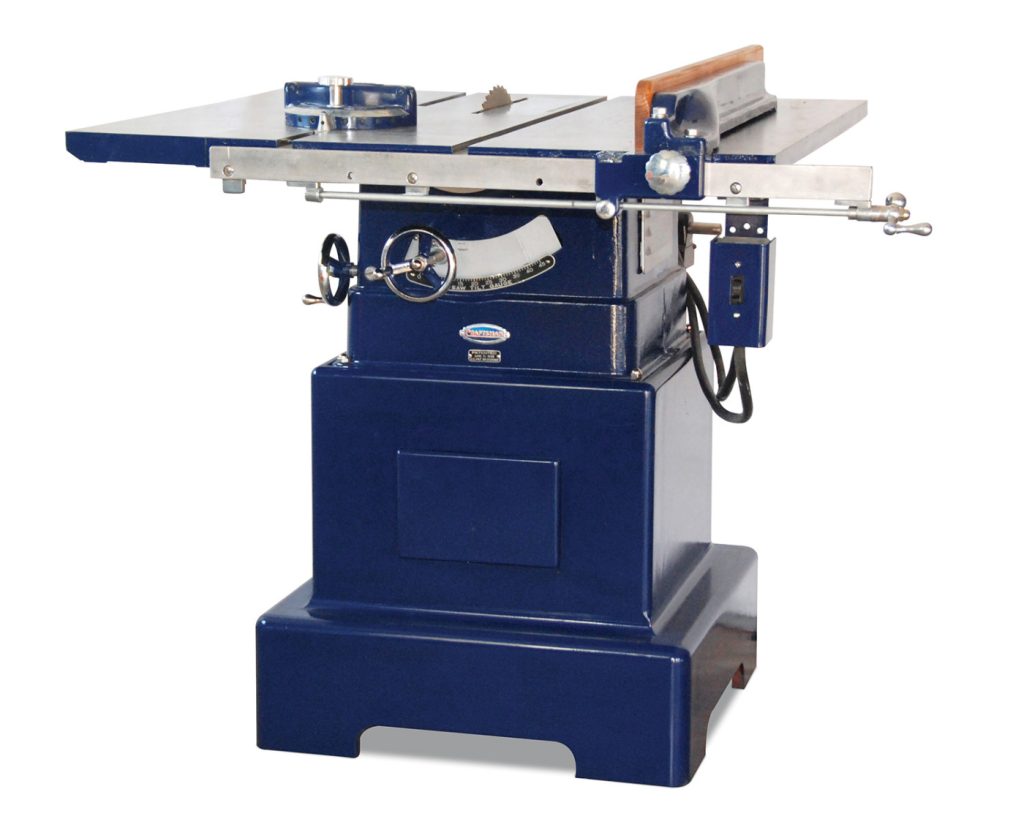 This beauty dates from 1939. The motor hangs off the back, like a contractor’s saw, but the trunnions are bolted to the body, like a cabinet saw. The body is all cast iron; I made the base below from …
 In order to keep my bench clear for working, yet have the tools I need close at hand, I came up with this stowable mounting system. Each of my bench tools is mounted on a board with slotted guide bars …
 Back in the late 1960’s, the folks at Record tools in Sheffield, England, redesigned their classic 044 plow plane (or plough plane, as they spelled it). It’s a tool used for making grooves by hand, and it’s hard to imagine …
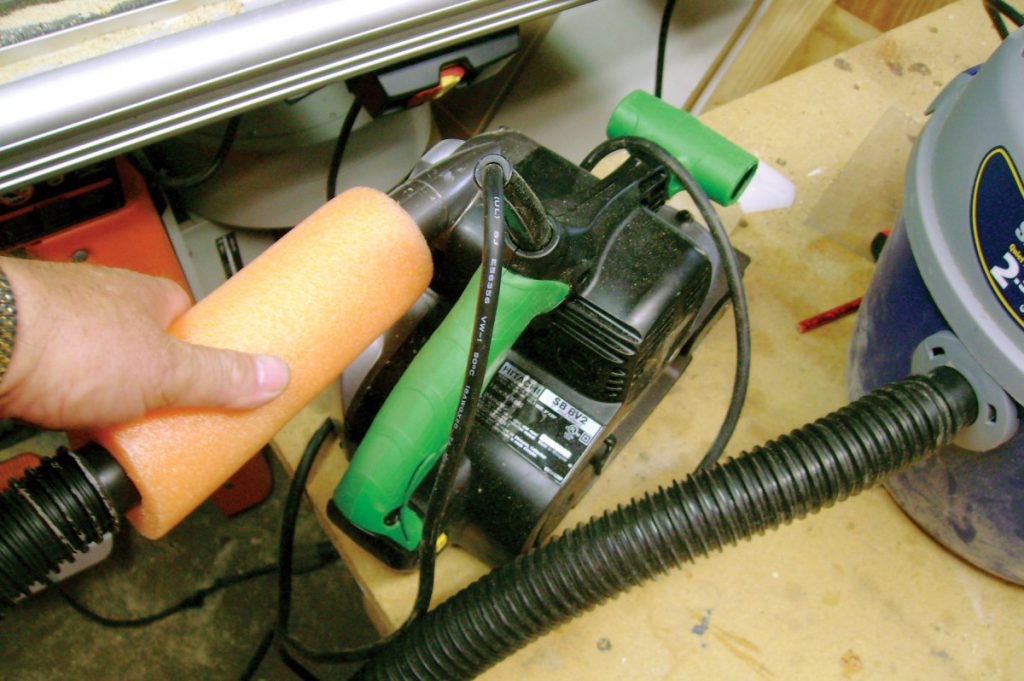 While lounging at the pool one afternoon, I had an inspiration. I “borrowed” one of my kids’ floating pool noodles, cut it into sections and used the pieces as universal connectors for vacuum hoses and tool dust ports. (A noodle …
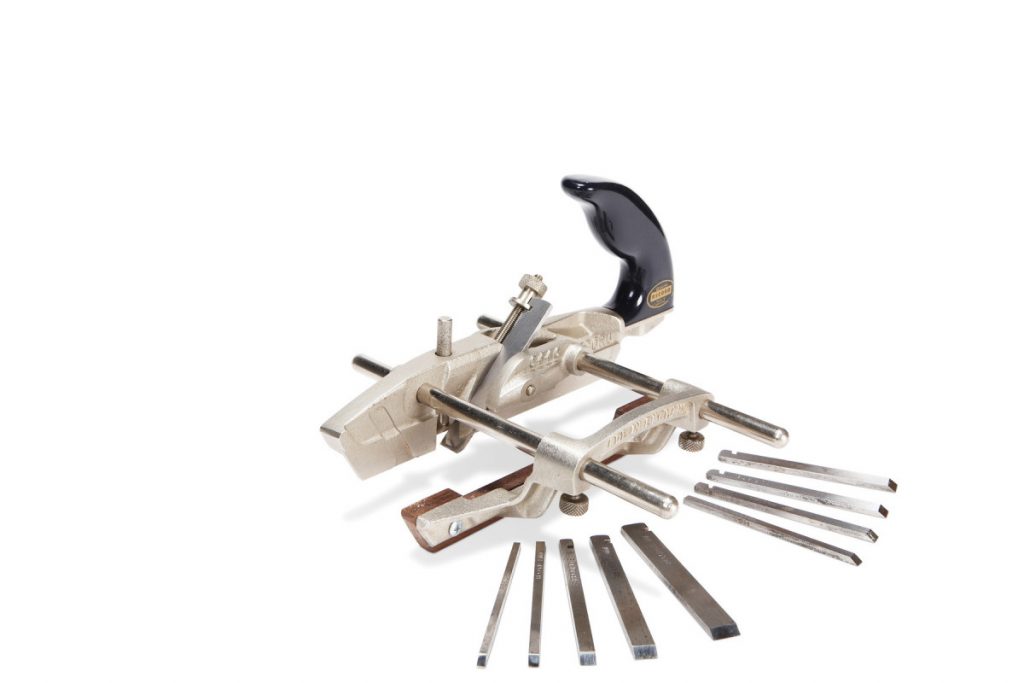
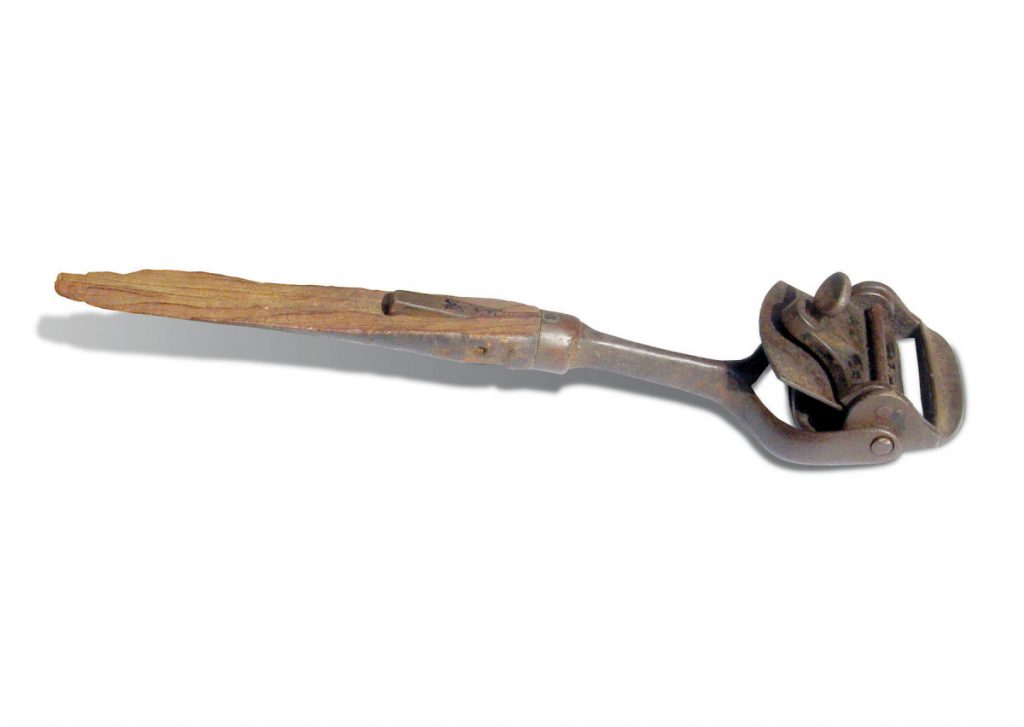 I collect all sorts of old tools. I figure that come the day when I need an unusual tool, I’ll have it, even if I only use it once. I’m still looking for the right opportunity to use my latest …
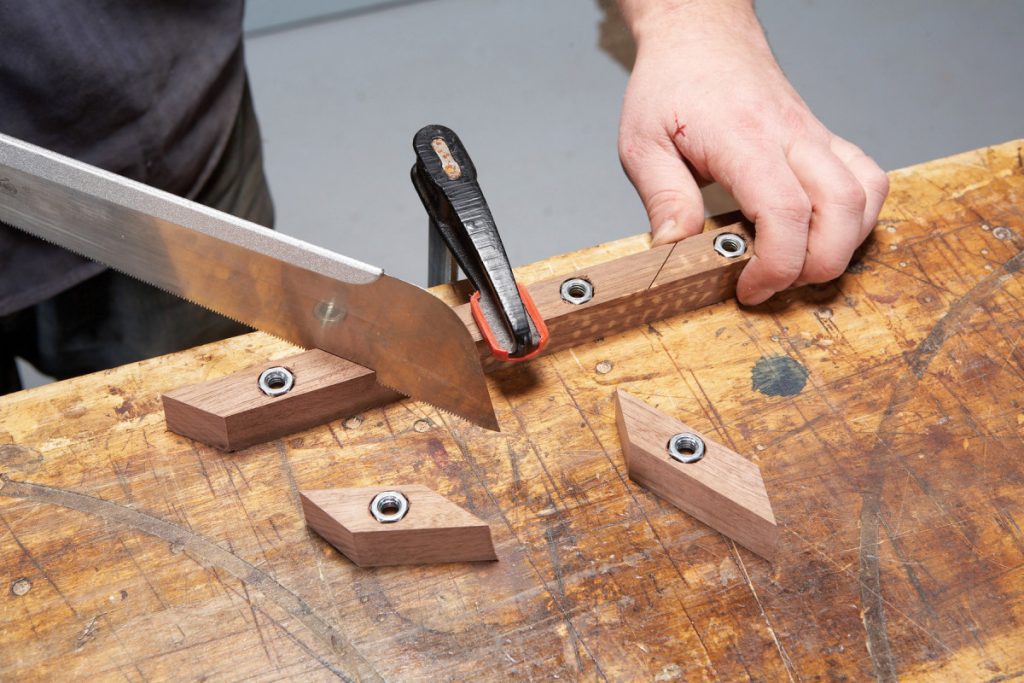 Wooden wing nuts are so much easier on your hands than metal ones. Plus, it’s a great way to use up shop scraps and leftover hex nuts while avoiding a trip to the hardware store. Start with a strip of …