Frank Klausz Finger Joint How-to [Video]
 It’s hard to fathom, but finger joints are a relatively new joinery method for Frank Klausz, because why not just cut dovetails when you need a box? In fact, when...
It’s hard to fathom, but finger joints are a relatively new joinery method for Frank Klausz, because why not just cut dovetails when you need a box? In fact, when...
It’s hard to fathom, but finger joints are a relatively new joinery method for Frank Klausz, because why not just cut dovetails when you need a box? In fact, when...
Over the past weekend I was able to finish up another tool box cleanup/restoration, this one also having been one of my stepfather’s. I was able to get a bit of the history of the box, as my mom was the person who purchased it as a birthday gift for back in November of 2002. To say that it presented a challenge might be an understatement. Physically, the box was not in horrible shape. The hinge was a touch askew, a few of the drawer slides were bent, and there were dents on the lid and on the base, but those weren’t the real issues.
When I first brought the box home I was surprised at how heavy it was, even when emptied out. The sheet metal is of a much heavier gauge than I first thought, in particular with the drawers being very beefy. The box was very dirty, as in coated with a film of grime and dust held on with a coating of machine oil. It was also covered in stickers (please don’t put stickers on your tool box…use magnetic stuff instead) This layer of grime was a problem, because it hid a troublesome layer of rust and made the rest of the box look otherwise deceivingly healthy.
The first thing I did after taking the box apart was vacuuming out any of the dirt that I could, Then the box got a bath with Dawn and a scrub brush, which at the least made me feel better about handling it without getting goo all over my clothes. I then removed the drawers and decorative drawer pull covers, scrubbing them down with Dawn as well. Thankfully, the drawers were mostly in good condition, with only a bit of surface rust in two of the smaller top drawers and the corner of the bottom drawer. But, like many things in life, bringing the box out into the light of day coupled with a thorough cleaning revealed the true nature of the beast, namely a layer of very heavy rust on the toolbox bottom.
I was able to knock out the dent at the bottom easily enough with a rubber mallet (the one on the lid was a bit more of a challenge) , but the rust was so bad that I very nearly decided against attempting the restoration, and if the gauge of the steel had been lighter it probably wouldn’t have been fixable. But, because the box belonged to my step dad, I soldiered on. Just like the smaller box I restored, I soaked this one in rust remover and in WD40 for several days, then came the long, arduous task of grinding and sanding away the rust so it could be painted. (There are more details in the video pasted below).

The box when I first brought it home. There was makeshift clasp attached to the upper left corner that I removed before the photo was taken (hence the holes)

The bottom of the tool box after nearly 2 days of soaking and several hours of grinding and sanding.

A look at the front of the box with the drawers and some of the stickers removed. There is a small hole visible under the lock that was covered by a sticker..not sure why or how the hole got there…

The box after some initial cleaning, grinding, and sanding. Some of the holes are filled in with the first application of epoxy.

The first coat of paint applied. After this coat I applied a bit more epoxy to better fill in the screw holes.

The finished tool box. 3 coats of paint, holes filled, drawer pulls polished.
There was unfortunately no magical transition, and Cinderella didn’t just turn into a princess with the snap of a finger….it just took a lot, and I mean a lot of elbow grease. Removing the stickers and residue was particularly grueling…once again…don’t put stickers on anything…they eventually wear out end up looking like hell. The drawer fronts were painted with a gloss black spray paint/primer combo, which I used because it was handy. But the rest of the box I painted with a Rust-Oleum paint/primer in the Hammered Black color, which I was very pleasantly surprised with. I chose Hammered Black because on the can it was advertised that it would mask slight imperfections, and I must say it did a pretty good job in that regard.
There are many details that I am leaving out that are made more clear in the video (that I hope you might watch). As of writing the post I am still in the process of lining the drawers. I was also able to purchase replacement keys from eBay for the box. Though I applied three coats of paint, I will also be on the lookout for any required touch ups, as there is always something that gets missed. But, all of the drawers work…the lock and release latches are functioning…the rust is all gone and there are no glaring dents or dings…the lid opens and closes much more smoothly…if anything else it is a functioning toolbox again that should last another 20 years.
The bottom line is that this box probably wasn’t as well cared-for as it could have been, but I am glad that I took the trouble, and it was trouble, to get it cleaned up and looking half-decent again. That being said, if I came across another box in the same condition I very likely wouldn’t touch it. We learn from experience…
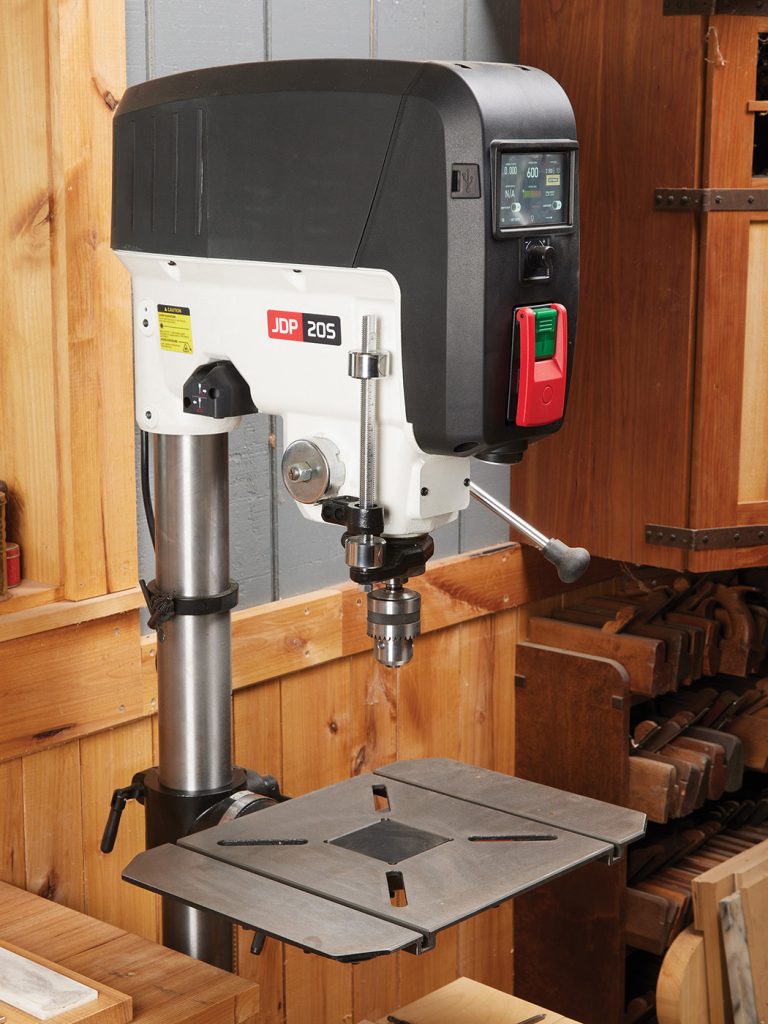 A drill press is a precision tool, but your accuracy will only be as good as your setup. Learn how to dial in your drill press for clean, accurate holes...
 When building his version of Steven Bunn’s Shaker Workbench, Logan decided to turn his own knobs instead of ordering them online. It’s a quick and easy project, and you can knock out enough knobs for an entire kitchen in …
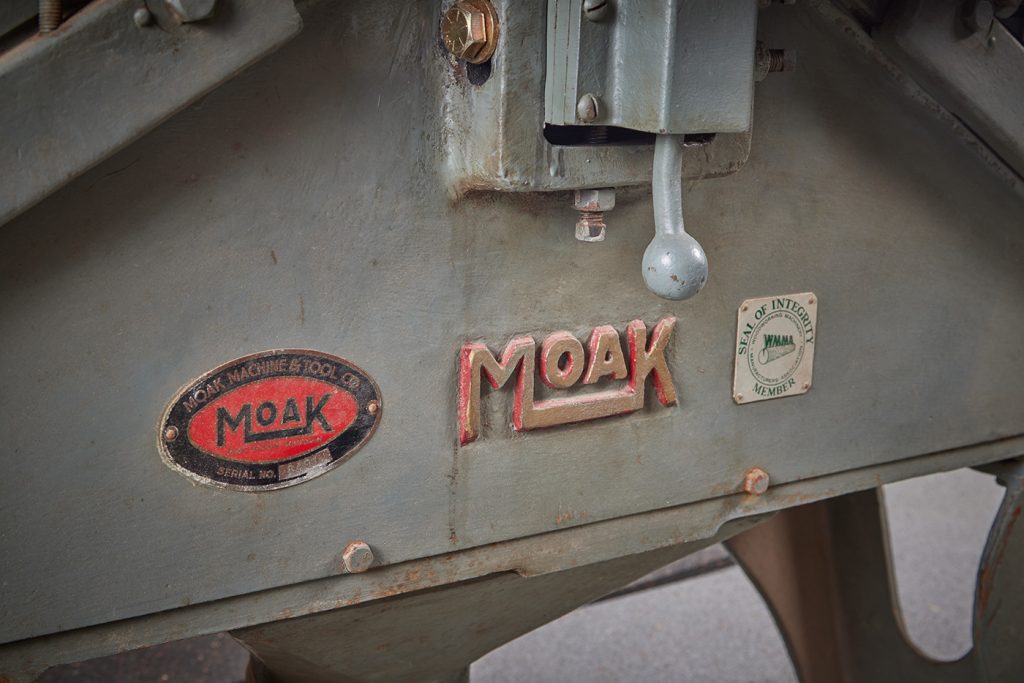 Logan loves his vintage woodworking machinery, and when the opportunity arose to purchase a 1950s MOAK jointer, he knew he couldn’t pass it up. The jointer needed work though — the head was stuck, the electrical was three-phase, and the …
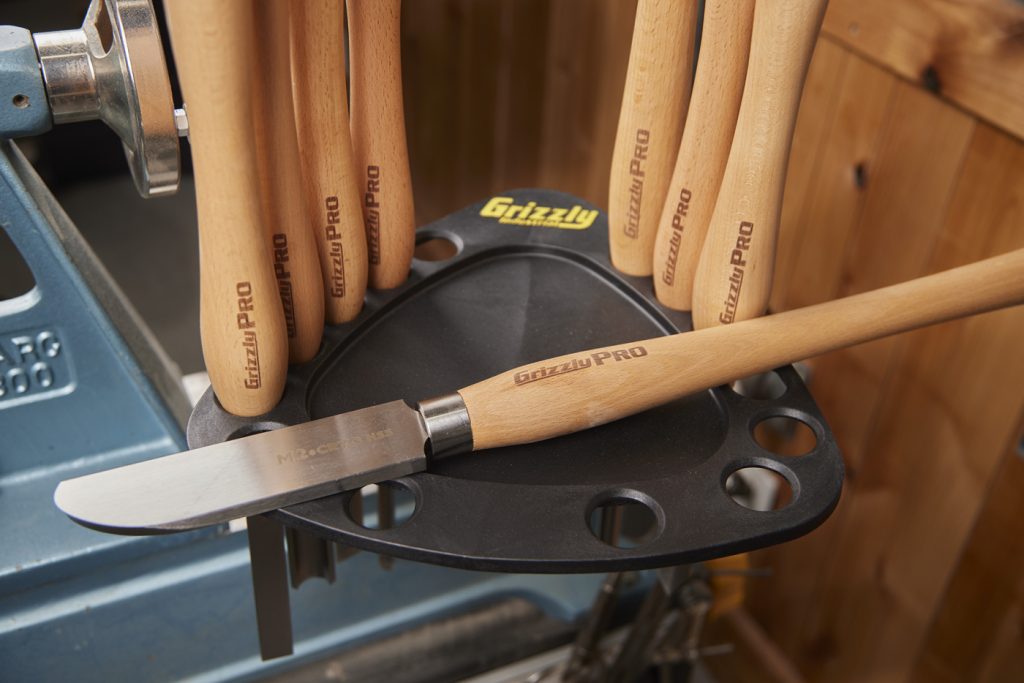
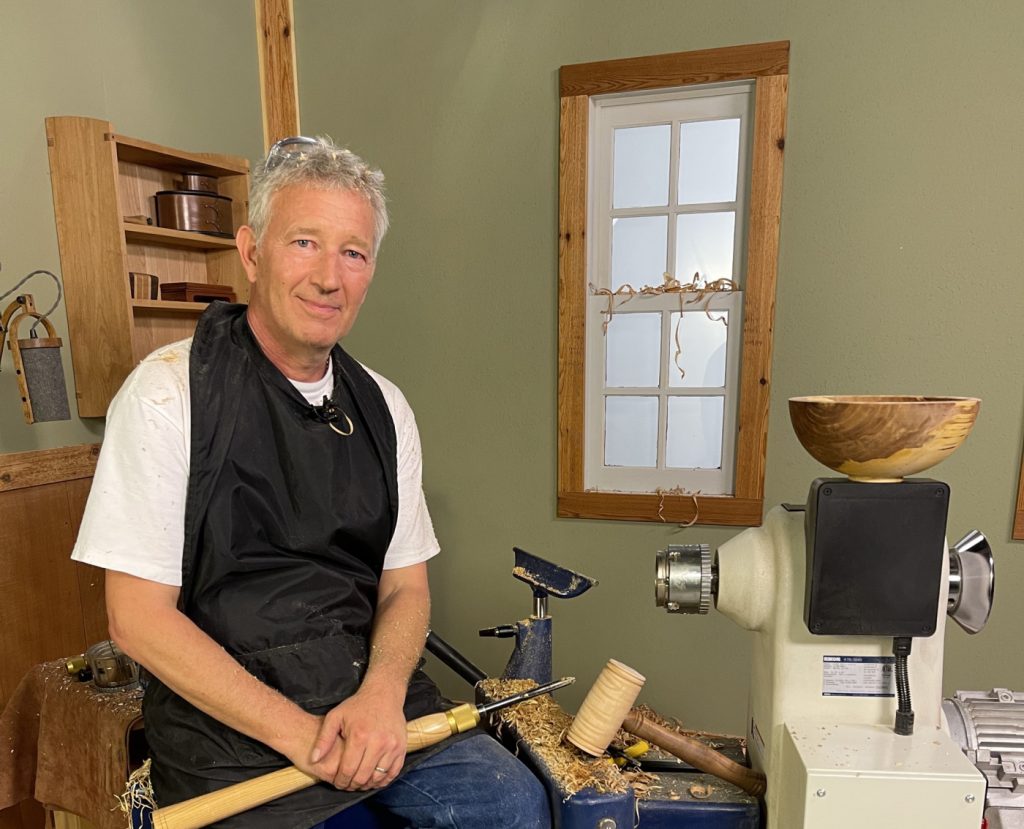 Learn the fundamentals of woodturning. With thirty-five years of experience, Jimmy Clewes knows a thing or two about woodturning. We’ve decided to tap into that knowledge with this exclusive video of him covering all of the basics of turning. Even …
 Pop Wood is getting into the halloween spirit, and what better way to do that than making a halloween decoration? I decided to recreate a wooden ghost my grandpa made more than two decades ago. Follow along in the video …
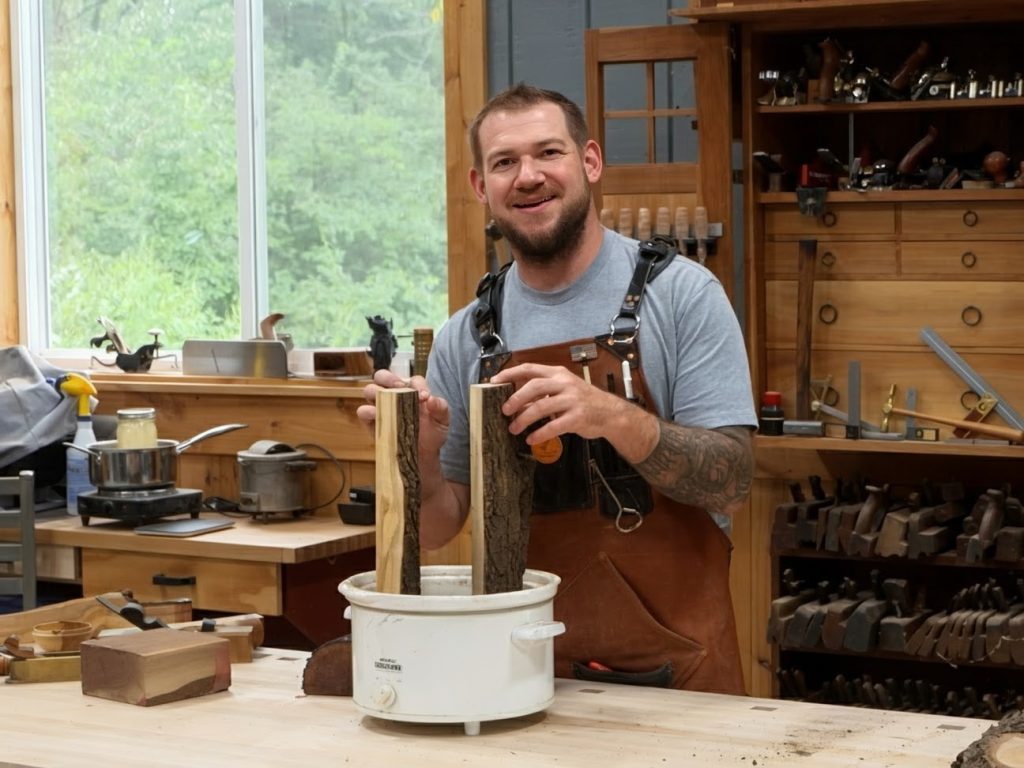 When working with green wood, it’s essential to prep it correctly in order to prevent cracking or splitting. Especially when you’re working with exotic lumber, you don’t want to waste a single board-foot if you can avoid it. Waxing the …
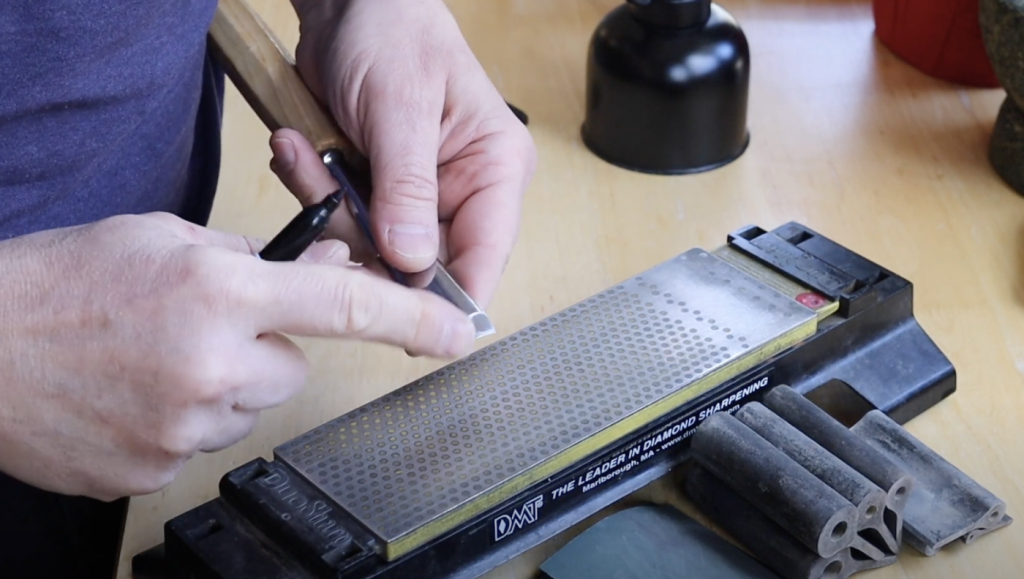 Last week, after posting three videos showing my gouge reformation and sharpening process, I decided to compile them into one unified tutorial. In the video, I explain the process and cover how to: Identify incorrect gouge edge geometry Tackle …
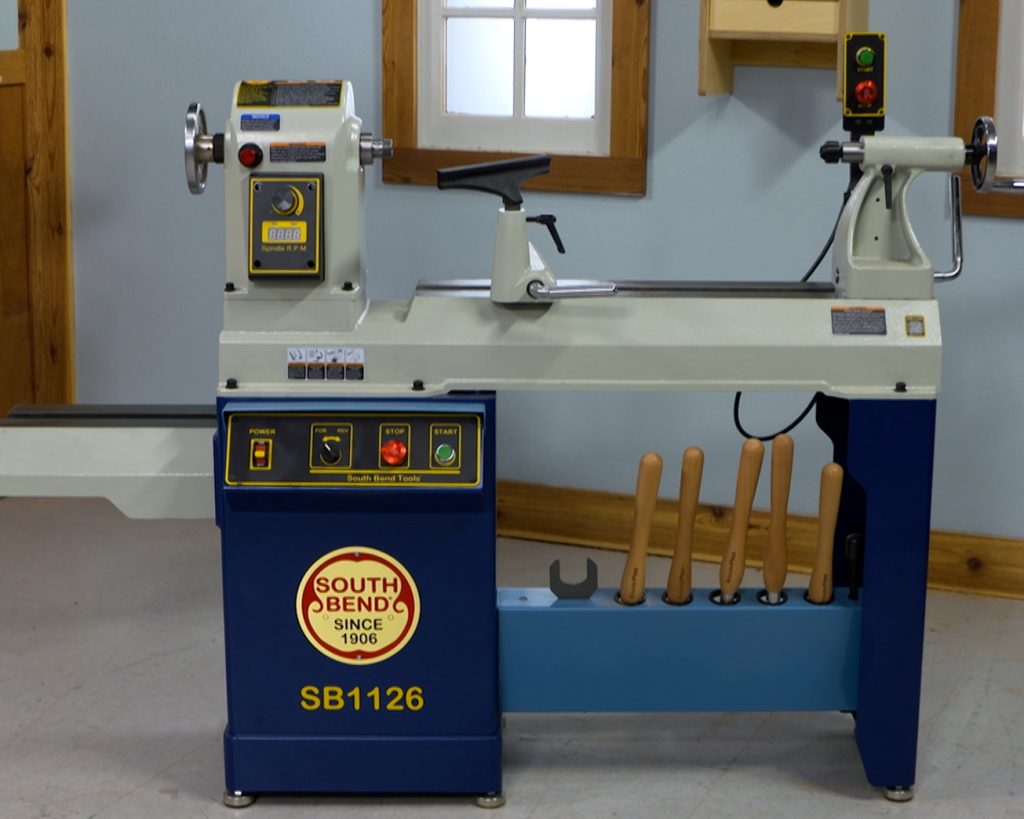 Being a first-time lathe buyer is a daunting task. How big of lathe do you really need? How powerful should it be? What features should you be looking at? Thankfully Logan is here to take some of the mystery out …

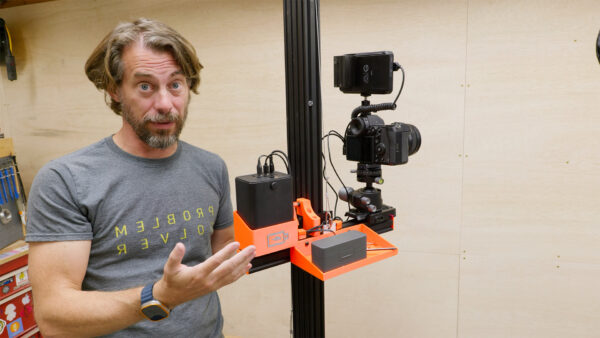
A while back, I built a camera stand for my shop that worked pretty well. It held cameras and lights, moved up and down smoothly, and rolled around the shop. The first version was good – maybe 75% of what I wanted – but I knew it could be better. I don’t usually revisit old projects, but this one seemed worth another look since other creators might find it useful. Plus, I had some ideas on how to fix the wobble issues that had been bugging me.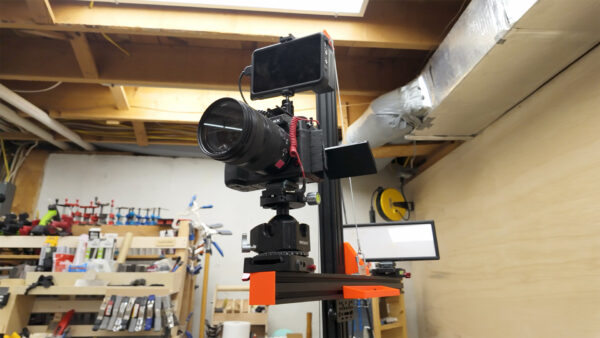 The biggest problem with the first version was stability. Every time I adjusted the camera position, the whole thing would shake and take forever to settle down. The wobble came from two main sources: the wheels at the base and the connection where the aluminum extrusion met the plywood base. I also had some space issues with the base – I was using concrete pavers for weight, which took up a lot of room, and the open storage tray was constantly filling with sawdust. To top it off, the counterweight design was dangerous – it stuck out too far and almost destroyed my camera a couple times.
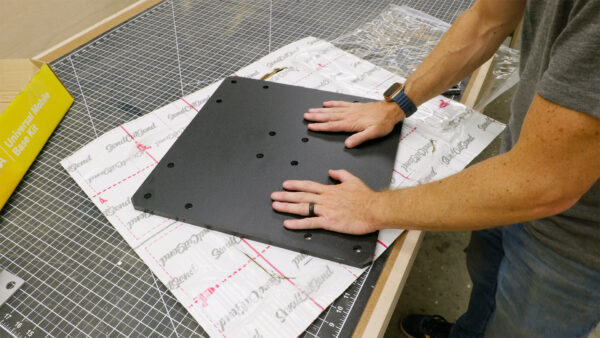 I started the redesign from the ground up, literally. Instead of the old plywood base with pavers, I had SendCutSend make me a half-inch steel plate with all the mounting holes pre-drilled. It’s actually heavier than all the concrete was, but takes up way less space. I also added a universal mobile base with retractable casters, so I can drop the whole thing right onto the floor when I need it to stay put. The combination made the base much more stable and easier to move around.
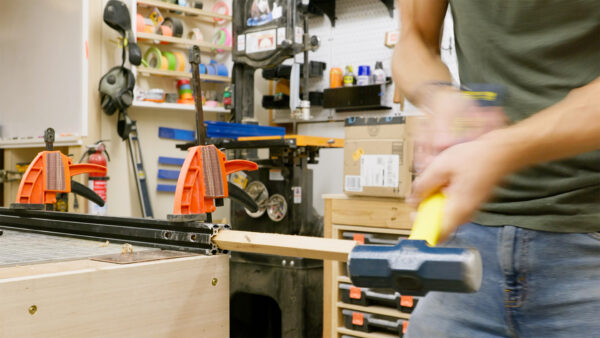 For the vertical post, I tried a few things to reduce the wobble. First, I got a single long piece of aluminum extrusion instead of joining shorter pieces. Then I tried filling the channels with hickory dowels to dampen the movement. That didn’t help much, so I ended up doubling up the extrusion – bolting two pieces side by side. This made a huge difference in stability. The camera still moves when you bump it, but it settles down much faster than before.
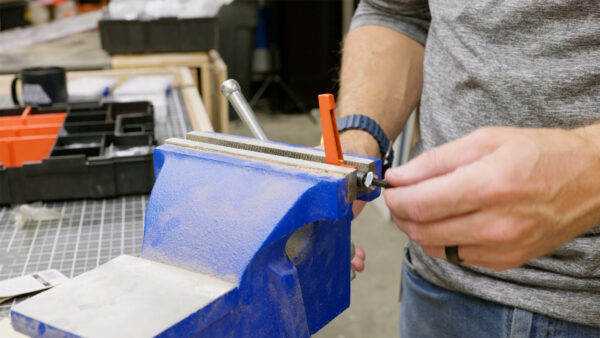 I completely redesigned the counterweight system to keep it from sticking out and threatening my camera equipment. Now it’s just a big piece of steel attached directly to the mounting plate. During this part of the build, I had to cut down some bolts to size, which gave me a chance to share a useful shop tip. When you need to cut a bolt shorter, thread a nut onto it past where you’ll make the cut. After cutting, unscrew the nut – it’ll clean up the damaged threads as it comes off, making it much easier to use the bolt in your project. It’s one of those simple tricks that saves a lot of headache.
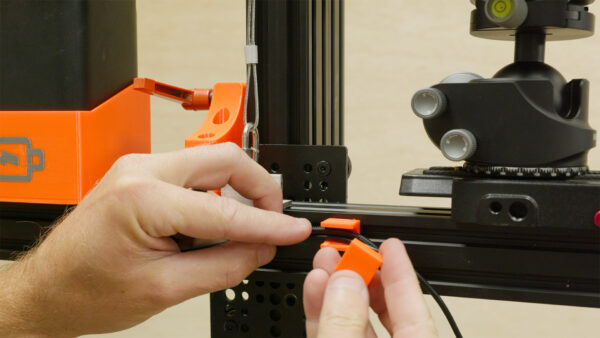
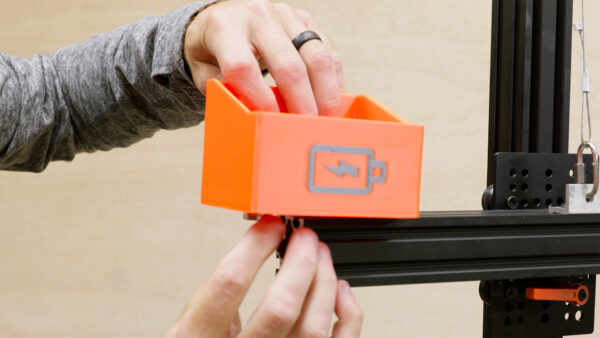 The power system got a complete overhaul too. Instead of keeping all my batteries and chargers in the base, I mounted a battery backup right to the column. It can run both the camera and monitor via USB, plus charge other accessories. Managing all those cables could have been a mess, but this is where having a 3D printer really paid off. I designed some custom cable clips that slide into the extrusion channels and hold everything neatly in place. Being able to create custom parts like this whenever I need them has changed how I approach problem-solving in the shop.
 This whole project got me thinking about why learning to use CAD software like Autodesk Fusion is so valuable. Every custom part on this build – from the cable clips to the battery mount – started as an idea that I could test and refine before printing anything. When you’re working on projects like this, being able to design and print custom parts saves tons of time compared to trying to modify off-the-shelf solutions or make everything by hand. It’s become such an important part of my workflow that I actually created an online course to teach others how to use Fusion, especially folks who’ve never done any 3D modeling before. If you want to learn more about learning to 3D model for your own projects, check it out here.
 The new version isn’t perfect, but it’s definitely better than the original. If I were to build it again, I’d probably start with bigger, thicker extrusion or maybe even use steel tube for the vertical post. But all these small improvements added up to make something that works better than before. Sometimes that’s the key to improving a project – not one big change, but a bunch of little ones that solve specific problems. The stand is more stable, more functional, and less likely to destroy my expensive camera gear, which makes it a win in my book. And best of all, I learned some new tricks along the way that I’ll definitely use in future projects. Thanks for hanging out with me, now go make awesome stuff!
(purchasing via these affiliate links supports ILTMS)
The post Making the Camera Stand Even Better appeared first on I Like To Make Stuff.
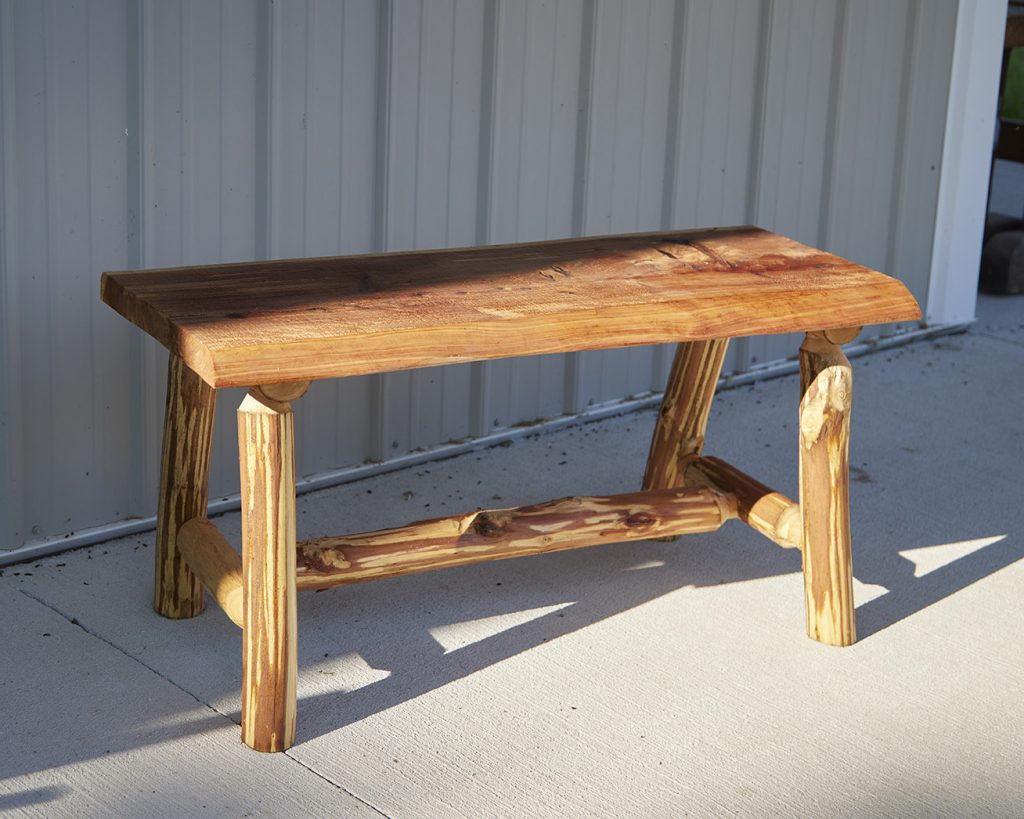 Today Logan is showing you how to make a rustic bench that would be great around the fire pit, a front porch, or even as part of a farmhouse dining set. This is the perfect weekend project for you to …
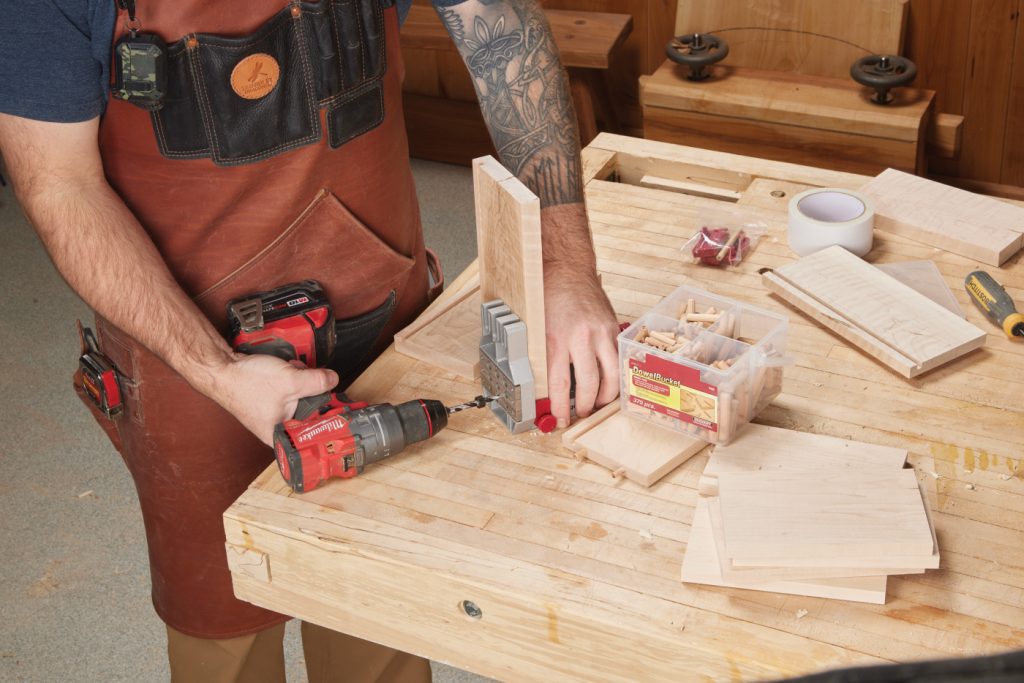 Today Logan is showing you how to make sturdy drawers with dowel joinery. They get a bad rap sometimes, but dowel joints are easy to make and long-lasting when used correctly. Learn more about the Milescraft JointMaster here. …
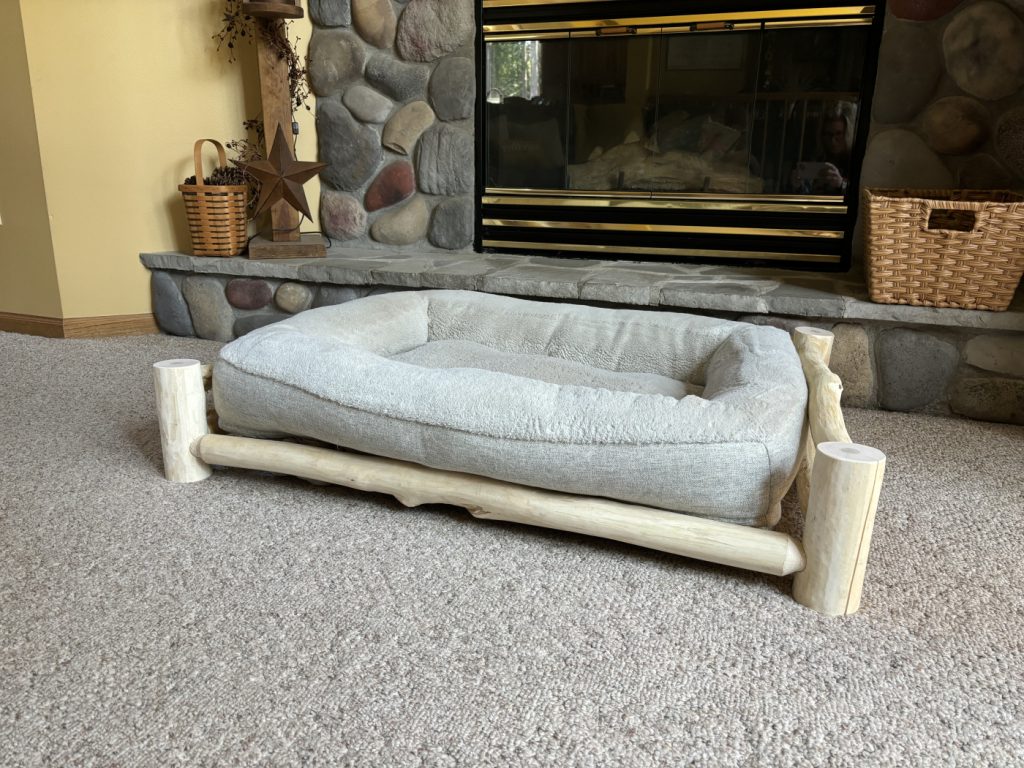 Man’s best friend deserves a worthwhile throne to rest upon, and what better aesthetic for a hunting dog than rustic logs cut with Lumberjack Tools? Logan walks you through the process of turning found lumber into a finished project.…
 Once you’ve chosen the type of lathe you want, the next big question is figuring out what sort of turning tools you need. Logan walks you through the different tools and features you should look for when assembling a quality …
 Turning a bowl from green wood has unique considerations versus a dried bowl blank. Logan walks you through the process, including the trick to drying a wet-turned bowl quickly when finished — the microwave. …
 While our new 1955 Crescent band saw was brand new on the pallet, that doesn’t mean it was in ready-to-go condition. The tires had deteriorated over the years, and we had to deal with the three-stage power requirements before the …
 Logan is really digging the new Harvey Big Eye Rip Fence System. In this video, he walks you through the standout features he appreciates. …
 Logan has finally found a band saw he considers to be adequately large — a 36-inch 1955 Crescent that was purchased as government surplus and never used. In this video, he walks you through the features and current condition of …
 Editor-in-Chief Logan Wittmer is finally in our new shop, and is excited to show off all the great features. In this video, he walks you through the process of applying a professional-style epoxy coating to a concrete floor, plus all …
