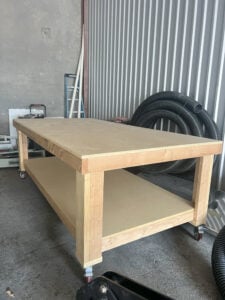
Need more room to spread out? This oversized workbench is our classic Shanty design scaled up to a full 48″ × 96″ (4×8) footprint. It’s sturdy, simple to build, and perfect for garages, school shops, and job-site prep spaces. A quick backstory This bench is special to me—I built it for my son and his company to use...
All living things evolve, and so do woodshops. No matter where I’ve lived, I’ve changed my shop around — relocating cabinets or shelves, changing one work area to another, adding to the infrastructure, etc. All of my older shops were …
Perfection doesn’t exist. But you can come close. One of the first things any beginning woodworker must do is set up a workshop. Like so many other things a novice woodworker must do, the preparation of a workshop shapes …
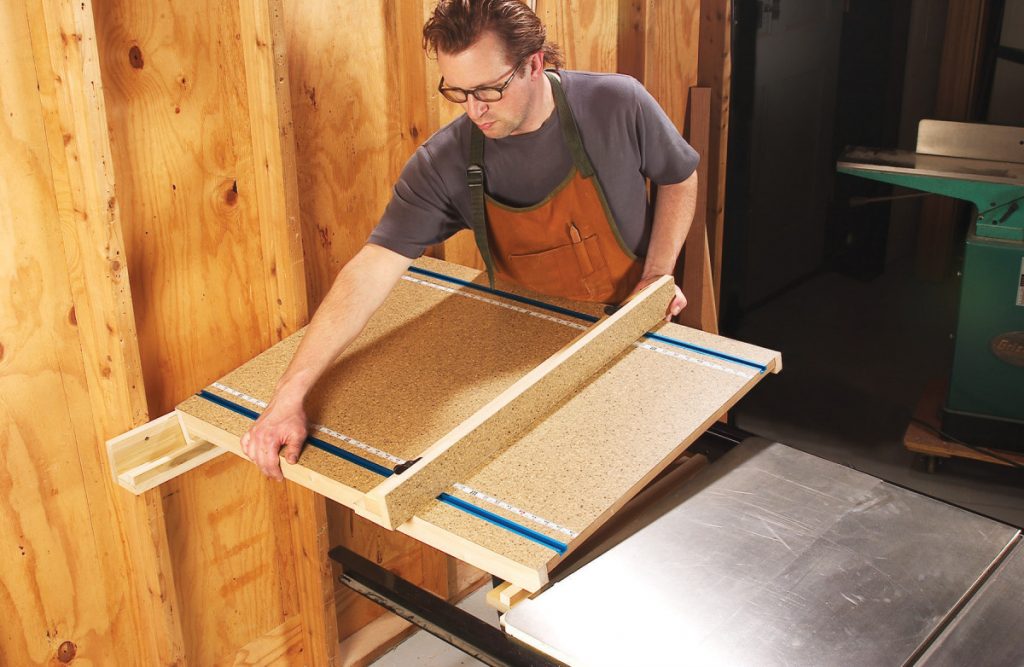
There’s not enough room in my garage shop for a tablesaw with a 52-in.-capacity rip fence. But no worries—I don’t need one! To make wide cuts, I simply install a shop-made extension that bridges my saw to the wall—and doubles …
A few tools can go a long way. When you get started in woodworking there are many paths to follow, forks in the road, dead-ends and shortcuts. It’s a journey that our forebears would make with the help of a …
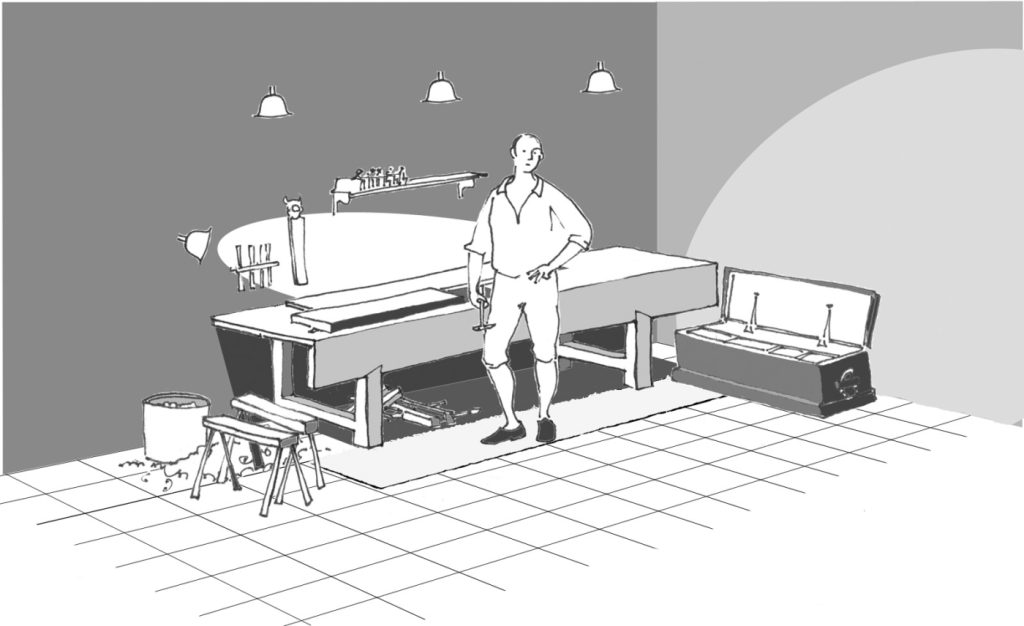
Woodworking with all the comforts of home. One glance in my shop reveals an unusual device—a reclining chair. But don’t get the wrong idea; things do get done here. It’s just that my 70-year-old back isn’t what it used to …
It’s about time time. After 7 years of accumulating tools, projects, and general clutter from making stuff, my workshop had become an unorganized mess. I could no longer easily access the things I needed or find motivation in the chaotic environment. But I had a plan to rethink the entire 1,100 square foot space.
My top priorities were creating a friction-free area to immediately start building ideas, while also optimizing for well-lit video presentations. I began by ruthlessly purging anything I hadn’t used in over a year – finally recycling metal scraps, donating unused tools, and tossing sentimental project remnants. This opened up vital space.
Next, I divided the shop into distinct zones: a wood workshop, storage area, and dust-free “clean room” for electronics and 3D printers. For each area, I listed priorities, physical constraints like walls and utilities, which objects belonged there, and how I needed to interact with the objects. Mapping this out, whether digitally or on paper, provides a flexible plan to reference.
Actually, this entire process of reorganizing my shop again led me down the path of distilling my thoughts into a repeatable worksheet that can help anyone to organize any space, whether it’s a workshop, a closet, or even a drawer. You can download the free worksheet here and use it to organize your own spaces.
With my woodshop area defined, I rearranged large tool stations like saws and workbenches based on workflow. Smaller tools found new homes through trial-and-error placement. Empty walls became welcome breaths of decompressed space. Organizational accessories helped declutter remaining items.
While not fully complete, the revised layout already inspires me with renewed making momentum. I’m excited to continue iterating and improvising storage solutions and the new clean room build. I have A LOT more space to organize—that clean room is next on the list—but I’m now confident that this system will help me keep everything in order as I make my way through the shop.
TOOLS
(purchasing via these affiliate links supports ILTMS)
Did you miss me? I'm back! After taking a two-month break for over two years, we've decided to move to bigger house with more land. I will be setting up a shop either in the garage or basement for now so I can start making videos again. After we get settled at the new place, we plan to add a building behind our house that will have more workshop space for me and plenty of gardening space for my wife. Stay tuned!
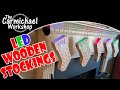
My daughter hung our Christmas stockings on the fireplace mantle and decorated them with some Christmas lights. This inspired me to try to make some wooden stockings that light up. In this video, I make a set of five cool LED stockings with the Inventables X-Carve CNC Machine. Inventables sent me their latest CNC upgrades, so we'll take a quick look what's new for the X-Carve CNC as well.
I found a Set of 5 Battery-Powered LED Puck Lights that fit perfectly inside the stockings. They included batteries and a remote control that controls all five puck lights at once. I simply stuck one light inside each stocking using the included double-sided tape.
These were really fun to make and they look really cool. I love the flashing and fading modes on the remote that make the lights change colors. I hope this gives you some ideas to make some wooden stockings of your own. Thanks for checking out this project! Steve...
Clicking a referral/affiliate link in this article and making a purchase will help to support my channel via a small referral fee from the merchant. Thank you for your support!
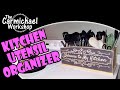
We have A LOT of kitchen utensils and our collection has outgrown the containers that hold them. In this video, I make a HUGE wooden Kitchen Utensil Organizer with the Inventables X-Carve CNC Machine. This project would be easy to make with other tools as well.
This was a fun project to design and make. It solves a problem in our kitchen and those are always the best kind of projects. Thanks for checking out this project! Steve...
Clicking a referral/affiliate link in this article and making a purchase will help to support my channel via a small referral fee from the merchant. Thank you for your support!
If you've ever been to a craft brew pub, you've probably seen the wooden beer flights that they use to carry tasting glasses or pint glasses to your table so you can taste the different beers. These make great gifts and craft fair items, and you might be able to find a local craft brewery that needs some. In this video, I make four different Beer Flights with the Inventables X-Carve CNC Machine.
I used the Inventables EASEL PRO software to design these. Making beer flights is a perfect example of how you could use a machine like the X-Carve CNC to mass produce projects to fulfill a large order from a craft brewery. Of course you can also make these with other tools - Click here to open my EASEL designs and download the drawings.
If you plan to make a beer flight, I suggest buying the glasses first so you can get accurate measurements for your design. I bought these 5oz Tasting Glasses from Amazon. Below are three beer flights I made for these smaller glasses.
On my fourth design, I created EASEL designs for both the tasting glasses and the full size pint glasses. Here is the beer flight I made for the pint glasses. I like how the pint glasses sit in the holes securely and will not tip over when being carried.
Since these beer flights will be in contact with lots of moisture and condensation, picking a finish that will last will be a challenge. I used spray lacquer for mine which should be ok for periodic home use. If they will be used daily, I would recommend a marine varnish that is used on boats, or an exterior paint would last a while too. No matter what you choose, plan on refinishing or replacing the beer flights at some point in the future.
Thanks for checking out this project! Cheers! Steve...
Clicking a referral/affiliate link in this article and making a purchase will help to support my channel via a small referral fee from the merchant. Thank you for your support!
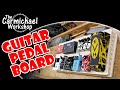
I made a Guitar Effect Pedal Board about two years ago, and of course, my collection of pedals has changed a lot. I challenged myself to make one with my Inventables X-Carve CNC Machine. It's made from 1/2" Baltic Birch plywood with holes in the top for routing cables under the board. Check out my video of this project below.
It took about 2 hours of machine time to cut all of the parts using the default settings, which are very conservative. I did a two-stage carve on the two side pieces. I used a V-Bit to carve the diamond pattern, then used an 1/8" straight bit to cut out the shapes.
I cut the Front and Back covers to the correct height with a 7 degree bevel to line up with the angle of the side pieces. I glued the four sides together, then glued that assembly to the underside of the top. The bottom was screwed on for easy access to run the cables inside the board. I added non-skid rubber pads to the bottom of the board.
The pedal board is finished with Deft Clear Wood Finish Satin spray lacquer. I attached the pedals using Velcro strips. I highly recommend these Flat Guitar Patch Cables for saving space between the pedals. Thanks for checking out my pedal board project!
Clicking a referral/affiliate link in this article and making a purchase will help to support my channel via a small referral fee from the merchant. Thank you for your support!
Previously I made a Jewelry Box for my daughter using the bandsaw. It was a fancy bandsaw box. I thought it would be fun to challenge myself to make one with my Inventables X-Carve CNC Machine. I designed a more modern box with shallow drawers and more compartments for separating the jewelry. I think it turned out pretty awesome! Check out my video of this project below.
I designed this project using the Inventables free EASEL online software. The project workspace has 4 tabs at the bottom. Tabs 1-3 are used to actually cut the parts from 3/4" maple and cherry boards. The 4th tab contains my original design drawings so anyone can customize the design to fit their needs. Click here to open my EASEL project to see how it's designed and make one yourself.
It took about 4 hours of machine time to cut all of the parts using the default settings, which are very conservative. That's ok, because I got a lot of other stuff done while the machine was hard at work.
I purchased some 1/4" aluminum rod from the home center and cut six pieces that are 3/4" long for the drawer pulls. I used the drill to spin them while I smoothed them out with sandpaper and gave them a brushed look. These look great and were super cheap.
The design contained alignment holes and I used some pieces of bamboo skewers as pins to keep the boards from sliding around during glue up.
I applied my favorite finish which is Deft Clear Wood Finish Satin Spray Lacquer and the box came out great. Thanks for checking out my project!
Clicking a referral/affiliate link in this article and making a purchase will help to support my channel via a small referral fee from the merchant. Thank you for your support!
:max_bytes(150000):strip_icc():format(jpeg)/IMG_0544-a8300c70a5264168a6748163e1f67fc5.jpg)
:max_bytes(150000):strip_icc():format(jpeg)/Pic2-42999553511f4514bf758b67cb77a9a4.png)
:max_bytes(150000):strip_icc():format(jpeg)/Cover-412022bb53e446bcb5703382b906fe0e.png)
:max_bytes(150000):strip_icc():format(jpeg)/Cover-fd15052ce37e4116ac7397ddd3937e43.png)
:max_bytes(150000):strip_icc():format(jpeg)/292-DuBois-1-352c1816983a4d43b905cabcb5fe5664.jpg)
:max_bytes(150000):strip_icc():format(jpeg)/01-295-Fjelstul_05-5175bcc2cf2340b6b8a9a5c1741108f5.jpg)
:max_bytes(150000):strip_icc():format(jpeg)/293-dust-1-2f8465188702444aa513b49c503dc35b.jpg)