WoodCentral

Normal view

Making a Camera Gear Organizer From a Mystery Flight Case

By: ILTMS
30 August 2025 at 15:00

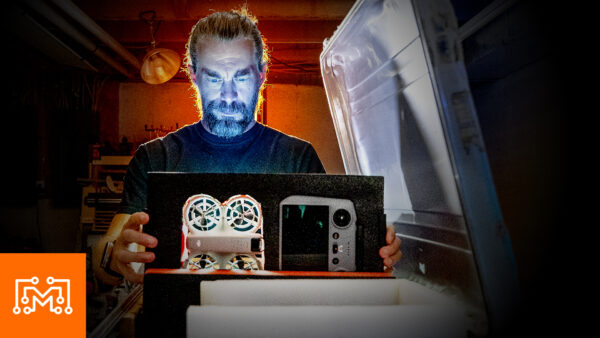
I picked up this weird aluminum flight case at a yard sale a while back, and honestly had no clue what the thing inside was supposed to be. The original equipment looked pretty high-tech, but I wasn’t planning to use it anyway. What caught my attention was the case itself – lightweight aluminum construction, built tough for travel, with some interesting mounting hardware already installed along the top edges. The whole thing just screamed “repurpose me into something useful.” Sometimes the best projects start with a mystery box and a vague idea of what could be possible.

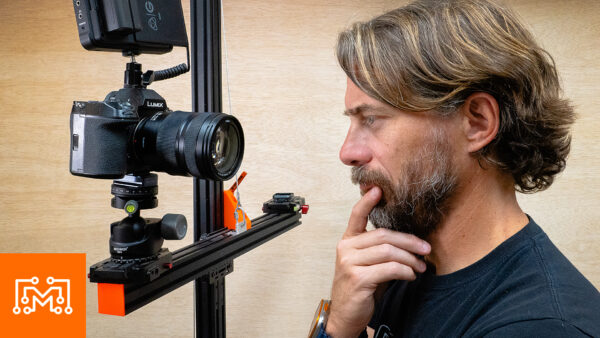
The problem I was trying to solve had been bugging me for months. As someone who makes videos, I keep accumulating camera gear – action cameras, drones, batteries, chargers, microphones, and all the little accessories that come with each device. Most of the time this wasn’t an issue since I shoot in my shop and have a dedicated gear cabinet to keep everything organized and dust-free. But recently I needed to take a bunch of cameras out to the farm for a project, and throwing everything into a backpack felt pretty sketchy. I needed a proper transportation solution that would protect expensive gear while keeping everything organized and accessible.

The inside of this case had serious potential. It was one big open volume with mounting brackets already in place, plus it was designed to travel and take abuse. But I couldn’t just throw foam in there and call it done – this had to be a real system.

My main camera is pretty substantial, so I knew I’d need to dedicate serious space for that. The smaller action cameras and accessories needed their own organized storage that wouldn’t turn into a jumbled mess every time I opened the case. The solution started to take shape as a two-section design that would maximize the available space while keeping everything accessible.

I decided to split the case into two distinct areas. The larger section would house my main camera in a custom-fitted cradle, with enough room for it to sit securely without getting cramped. The other section would work more like a library system – foam panels that could slide in and out of tracks, each one holding specific cameras and gear in perfectly cut foam recesses. This way I could pull out exactly what I needed for a particular shot without disturbing everything else. The concept was solid, but figuring out the mechanical details would take some work.

The foam panels were the trickiest part to get right. I ordered some layered tool foam that lets you trace around objects and peel out layers to get the exact depth you need. The challenge was making these panels work vertically instead of horizontally like they’re designed for. Each panel needed to slide smoothly in tracks while holding cameras securely, which meant getting the spacing just right. Too loose and things would rattle around, too tight and the panels wouldn’t slide properly. I also had to account for the fact that most of my gear wasn’t as thick as the foam, so the panels could sit pretty close together without interference.

The mechanical system required some 3D printed components to make it all work. I designed simple clips that would grip around the outside of each foam panel while having a fin on the back that could slide down into wooden tracks. Getting these printed parts to fit properly took a few iterations, but the concept was sound. I also had to add some taper to the top of the track openings so the panels would guide themselves into position instead of requiring perfect alignment every time. Sometimes the little details like that make the difference between a system that works smoothly and one that’s frustrating to use.

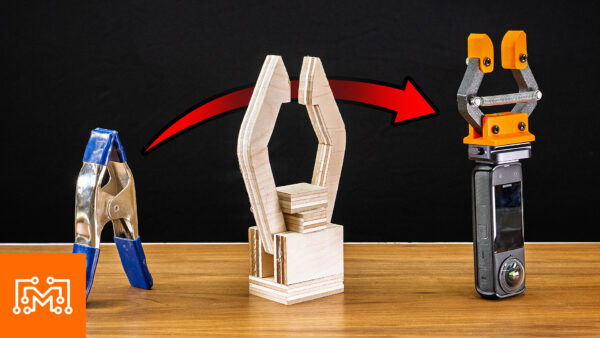
For the main camera section, I went all-in on custom protection. Instead of just stuffing foam around it, I took a photo of the camera’s bottom and modeled a precise cradle in Autodesk Fusion. This let me create something that would hold the camera exactly right while providing maximum protection. The cradle got 3D printed, and I also designed a flexible strap system that could hook over the camera to lock it down securely. If you’re interested in learning this kind of 3D modeling and design work, you should check out our “Fusion for Makers” course – it covers exactly this type of practical problem-solving with Fusion.

The finished case turned out better than I expected. Everything has its place, from the smallest memory card to the main camera, all surrounded by foam and protected by that aluminum shell. The sliding panel system works smoothly, and I can grab exactly what I need without unpacking the whole case. Plus I can lock it up and toss it in the truck without worrying about expensive gear getting damaged. Sometimes the best projects come from combining something you found cheap with a problem you actually need to solve.

Thanks for following along with this build. Now, go make something awesome!

TOOLS

(purchasing via these affiliate links supports ILTMS)

Woodworking

Finishes & Adhesives

3d Printing/CNC/Laser

Welding

Electronics

Other Stuff

The post Making a Camera Gear Organizer From a Mystery Flight Case appeared first on I Like To Make Stuff.

  •  

Quickly Prototyping a Camera Clamp

By: ILTMS
23 November 2024 at 16:00

A few weeks ago, I faced a problem: I wanted a flexible way to mount my 360 camera around my workshop. Sure, I could have bought a pre-made solution or made due with a spring clamp, but where’s the fun in that? Like most of my projects, this was about solving a specific need and learning something in the process. I had a 360 camera that could capture video in every direction, and I wanted a mount that would let me position it anywhere on my shop’s exposed ceiling joists without hassling with complicated clamps or climbing on a ladder.

My first attempts were rough. I started with a basic prototype using rubber bands and some hand-cut pieces. It quickly became clear that my initial design had some major flaws. The spring tension wasn’t strong enough, the pieces didn’t move or grip how I wanted, and the whole thing felt like a janky, temporary solution. But that’s the beauty of prototyping — each failure teaches you something new. I realized I needed to think about two key things: the right spring force to hold the mount, and the best shape for keeping it in place without being difficult to remove.

I considered several design concepts. One idea involved little fingers that would twist around the joists, but that seemed overly complicated. Another involved a cam mechanism that would clamp down, but that felt too complex. Ultimately, I settled on the simplest solution: a mount with spring tension that could spread around a joist and hold tight until deliberately pulled down. The beauty was in its simplicity, especially since the camera weighs almost nothing.

As I worked through different prototypes, I learned a lot about clamp design. I discovered that the geometry of each piece matters tremendously. The top needed to be wedge-shaped to allow forced entry and tightening. The ends needed to pivot, like traditional clamps, to create a better grip. I also had to figure out how to incorporate a quarter-twenty bolt to attach the camera mount, which added another layer of design complexity.

3D modeling became my secret weapon. Instead of just making something for myself, I started thinking about how I could design this in a way that might help other makers facing similar challenges. By turning my physical prototypes into a digital model, I could refine the design, make it more universally useful, and potentially share it with others. It’s something I always emphasize — being able to 3D model your ideas is like a superpower for problem-solving and sharing solutions.

After multiple iterations and reprints, I finally nailed the design. I spent time testing different springs, drilling precise holes, and ensuring the mount could grip joists securely. The final test was crucial: Could I move this mount quickly around different parts of my shop? Absolutely. I could push it up to the ceiling in one spot, take it down, and immediately reposition it over my workbench or in another area of the workshop.

This project wasn’t just about creating a camera mount. It was about the process of iterating, learning, and solving a specific problem. Each prototype taught me something new about mechanical design, spring tension, and the importance of thoughtful iteration. What started as a simple need to mount a 360 camera became a mini-engineering journey that improved my understanding of how things work.

Would I have been better off buying a pre-made solution? Maybe. But that misses the point of making. For me, the joy isn’t just in the final product, but in the process of figuring things out, making mistakes, and ultimately creating something unique that solves exactly what I need. This camera mount might seem like a small thing, but it represents something bigger: the maker’s spirit of creativity, problem-solving, and the satisfaction of building something with your own hands. Thanks for being here with me. Now go make something awesome!

TOOLS

(purchasing via these affiliate links supports ILTMS)

Woodworking

3d Printing/CNC/Laser

Other Stuff

The post Quickly Prototyping a Camera Clamp appeared first on I Like To Make Stuff.

  •  

Making the Camera Stand Even Better

By: ILTMS
1 November 2024 at 15:00

A while back, I built a camera stand for my shop that worked pretty well. It held cameras and lights, moved up and down smoothly, and rolled around the shop. The first version was good – maybe 75% of what I wanted – but I knew it could be better. I don’t usually revisit old projects, but this one seemed worth another look since other creators might find it useful. Plus, I had some ideas on how to fix the wobble issues that had been bugging me.The biggest problem with the first version was stability. Every time I adjusted the camera position, the whole thing would shake and take forever to settle down. The wobble came from two main sources: the wheels at the base and the connection where the aluminum extrusion met the plywood base. I also had some space issues with the base – I was using concrete pavers for weight, which took up a lot of room, and the open storage tray was constantly filling with sawdust. To top it off, the counterweight design was dangerous – it stuck out too far and almost destroyed my camera a couple times.

I started the redesign from the ground up, literally. Instead of the old plywood base with pavers, I had SendCutSend make me a half-inch steel plate with all the mounting holes pre-drilled. It’s actually heavier than all the concrete was, but takes up way less space. I also added a universal mobile base with retractable casters, so I can drop the whole thing right onto the floor when I need it to stay put. The combination made the base much more stable and easier to move around.

For the vertical post, I tried a few things to reduce the wobble. First, I got a single long piece of aluminum extrusion instead of joining shorter pieces. Then I tried filling the channels with hickory dowels to dampen the movement. That didn’t help much, so I ended up doubling up the extrusion – bolting two pieces side by side. This made a huge difference in stability. The camera still moves when you bump it, but it settles down much faster than before.

I completely redesigned the counterweight system to keep it from sticking out and threatening my camera equipment. Now it’s just a big piece of steel attached directly to the mounting plate. During this part of the build, I had to cut down some bolts to size, which gave me a chance to share a useful shop tip. When you need to cut a bolt shorter, thread a nut onto it past where you’ll make the cut. After cutting, unscrew the nut – it’ll clean up the damaged threads as it comes off, making it much easier to use the bolt in your project. It’s one of those simple tricks that saves a lot of headache.

The power system got a complete overhaul too. Instead of keeping all my batteries and chargers in the base, I mounted a battery backup right to the column. It can run both the camera and monitor via USB, plus charge other accessories. Managing all those cables could have been a mess, but this is where having a 3D printer really paid off. I designed some custom cable clips that slide into the extrusion channels and hold everything neatly in place. Being able to create custom parts like this whenever I need them has changed how I approach problem-solving in the shop.

This whole project got me thinking about why learning to use CAD software like Autodesk Fusion is so valuable. Every custom part on this build – from the cable clips to the battery mount – started as an idea that I could test and refine before printing anything. When you’re working on projects like this, being able to design and print custom parts saves tons of time compared to trying to modify off-the-shelf solutions or make everything by hand. It’s become such an important part of my workflow that I actually created an online course to teach others how to use Fusion, especially folks who’ve never done any 3D modeling before. If you want to learn more about learning to 3D model for your own projects, check it out here.

The new version isn’t perfect, but it’s definitely better than the original. If I were to build it again, I’d probably start with bigger, thicker extrusion or maybe even use steel tube for the vertical post. But all these small improvements added up to make something that works better than before. Sometimes that’s the key to improving a project – not one big change, but a bunch of little ones that solve specific problems. The stand is more stable, more functional, and less likely to destroy my expensive camera gear, which makes it a win in my book. And best of all, I learned some new tricks along the way that I’ll definitely use in future projects. Thanks for hanging out with me, now go make awesome stuff!

TOOLS

(purchasing via these affiliate links supports ILTMS)

Woodworking

3d Printing/CNC/Laser

Other Stuff

The post Making the Camera Stand Even Better appeared first on I Like To Make Stuff.

  •  

Bigger and Better? Perhaps....

7 December 2015 at 13:09
I recently acquired a Wisner 4X5 Technical Field Camera. This means I am now experimenting with large format film photography. Oh my! This is an entirely new set of skills to me. My camera is basically a box where the lens is separated from the film plane by leather bellows. The camera can be adjusted in the front and back: front rise, tilt, swing, and shift; back rise, swing, and tilt. This

  •  

Adventures with film

19 January 2015 at 14:35
A little less than two months ago, I walked into a used camera store to support Steve in his search for a 35 mm rangefinder film camera. I walked out with a Yashica Mat 124-G Twin Lens Reflex (TLR) camera (Steve did get his camera, too, which he broke on one of its first outings). The TLR is a medium format film camera, and I've been experimenting with different brands and ASA ratings of film.&

  •  
❌