Building a Veneer Vacuum Bag
By Jim Shaver
Recently, the Halton Furniture Makers Society visited Humber College in Toronto to learn a bit about building and using veneering bags.
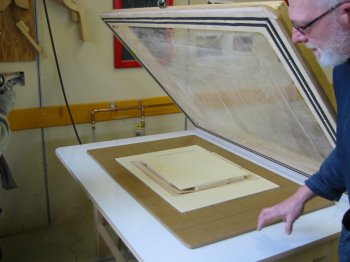
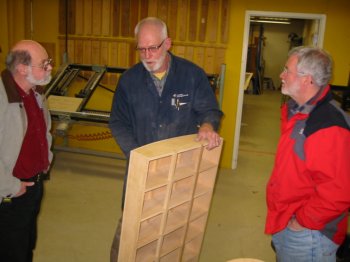
We met with Johan and he walked us through the process the school uses with the wood technology students (three semester, one year program). Johan showed us several veneering set-ups including a home made vacuum frame as well as several dedicated bag set-ups.

All the applications were homemade, and the pumps were either bought or built for the shop over the years.

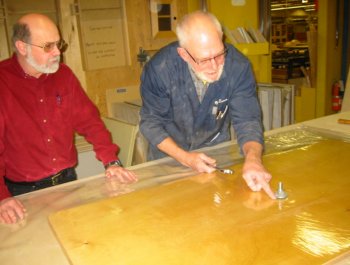
We also had the chance to actually build a bag with Johan. This was a very good opportunity for many of us as Johan shared with us his process and showed us how simple and cost effective it really is.

We were a little surprised that he only uses 20 mil vinyl for his bags and even with the very heavy student use he showed us how they last about 18-20 months. Remember, they have students in a trimester system and they are starting a new cycle of classes and students every semester, so there is heavy use all the time from each semester's class of students as they start veneering on the second project they are taught in the first semester.
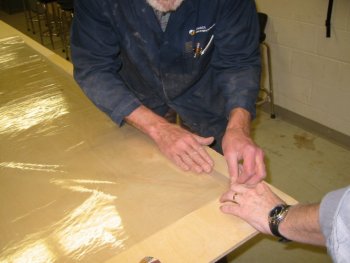
Johan showed us how, over years of experimentation, he has settled on this process. Using 20 mil vinyl which he buys locally from a plastic supplier at less than $8 a yard he uses glue on the edges, which dries once applied and is reactivated by heat and sealed with pressure—how simple. The glue is HelmiBond 808 Emulsion Adhesive (helmitinadhesives.com). It dried in 15- 20 minutes and Johan said it does not stick to itself like contact cement, but will bond when heated.
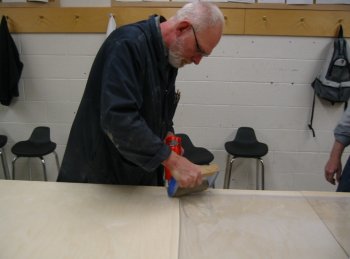
The edges to receive glue are roughed with 180 grit paper then the surface is cleaned up with a light acetone wipe. The bag is created by folding the vinyl on itself to length, then a heat gun and roller are used to seal the edge.
Finally after the edges are done, Johan showed us how they use a dedicated plenum and connection which allows the bag to be sealed and placed on a dedicated work table with its own center hole for the vacuum line to drop through to the pump.
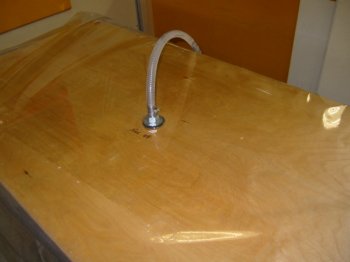
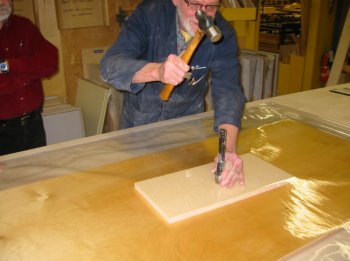
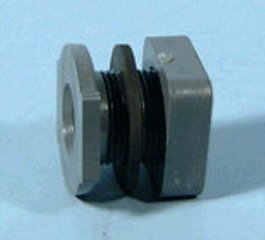
Johan uses a home made fitting. He had a large hex head hollow fastener that he had milled to create a smooth end, then the complementary nut was also hollowed out, leaving about 50% of the thread. The hollow allows for the capture of the hex head through the bag.

Two rubber washers and a metal washer sandwich the coupling arrangement. Once the nut was tightened, it created a sealed connection.
The plenum has a hollow recess in its back to accept the hex head. There is a small drilled hole through this recess to allow the vaccum to be drawn from the top of the plenum.
I am sure a similar coupling using plastic components could be made as well (see Carol Reed's note below).
In less than 30 minutes we made the bag and had it back on the work table for a test run. Success!
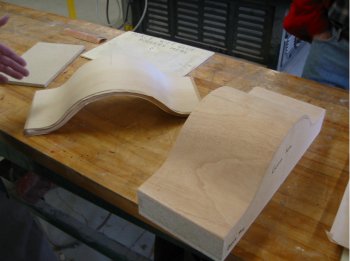
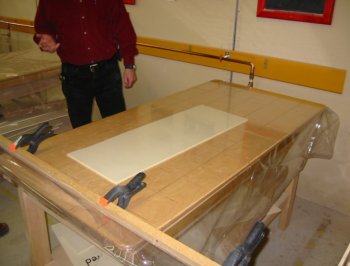
This example is a student assignment to build a display cabinet. The students were required to build the bending forms and then to use the form to make the arched component for the cabinet. The top was built using wood veneers and 8 mm “wiggle board”.
This exercise shows the huge potential for using forms and a vacuum press system to design and build projects with curved surfaces.
Carol Reed adds : I (and my students) use a bulkhead fitting from U.S. Plastics. We cross-drill the inside flange so as not to get an airlock against the platen inside the bag. We got the ¼" NPT female, so we could screw in the male end of a quick disconnect fitting, then used regular airline hose with quick-disconnect fittings to attach it to the pump.
I like the yellow coil air hose to make the connection. It is lightweight. Just don't get the one with the swivel ends. They all leaked when we tried them.
16421 ¼" NPT female Polypropylene Loose Tank Fitting w/Neoprene Gasket $6.68
Comments (0)
No comments yet. Be the first!
Leave a Comment